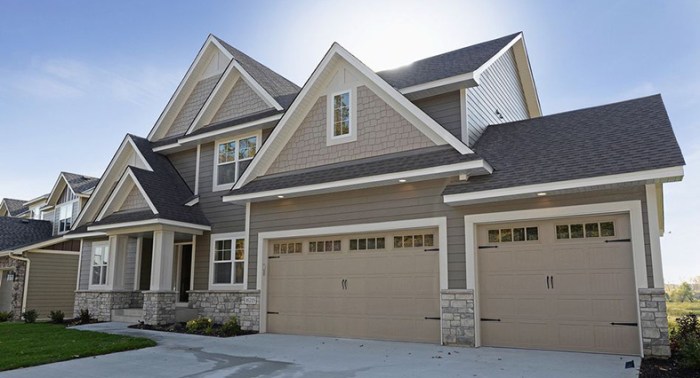
How to Install Hardie Plank Siding
How to install Hardie Plank siding? It might sound daunting, but with the right tools and a little know-how, you can transform your home’s exterior. This guide breaks down the process step-by-step, from planning and preparation to finishing touches, ensuring a professional-looking result. We’ll cover everything from choosing the right nails to mastering tricky cuts around windows and doors. Get ready to upgrade your curb appeal!
This comprehensive guide covers all aspects of Hardie Plank installation, from initial planning and material selection to the final finishing touches. We’ll delve into the nuances of various installation techniques, addressing common challenges and providing practical solutions. Whether you’re a seasoned DIYer or a first-timer, this guide will equip you with the knowledge and confidence to tackle this project successfully.
Planning & Preparation
Getting started with Hardie Plank siding installation requires careful planning and preparation. This ensures a smooth, efficient process and a professional-looking finished product. Proper preparation will save you time and prevent costly mistakes down the line. Let’s dive into the essential steps.
Necessary Tools and Materials
Before you begin, gather all the necessary tools and materials. This will prevent interruptions during the installation process. Having everything readily available significantly improves efficiency.
- Measuring tape
- Level
- Chalk line
- Circular saw or miter saw (for cutting Hardie Plank)
- Drill with appropriate drill bits
- Hammer
- Safety glasses
- Work gloves
- Caulk gun
- Nail gun (recommended for faster installation)
- Appropriate fasteners (galvanized nails or screws)
- Hardie Plank siding
- J-channel
- Corner trim
- Flashing (as needed)
- Caulk (exterior grade)
- Primer (if required by the manufacturer)
Site Preparation and Measurements, How to install Hardie plank
Accurate measurements and thorough site preparation are crucial for a successful Hardie Plank installation. Failing to properly prepare the surface can lead to issues with adhesion and overall appearance.
- Thoroughly clean the surface of the building to remove any dirt, debris, loose paint, or other obstructions. Power washing is often the most effective method.
- Carefully measure the area to be sided, noting any irregularities or obstructions. Accurate measurements are essential for determining the amount of Hardie Plank needed.
- Create a detailed layout plan, considering the vertical or horizontal orientation of the siding. This plan should account for all corners, windows, doors, and other features.
Planning the Hardie Plank Layout
Choosing between vertical and horizontal orientation affects the overall aesthetic and potentially the installation process. Consider the architectural style of the building and your personal preference.
Vertical installation creates a taller, more modern look. Horizontal installation provides a more traditional and classic appearance. The choice is largely aesthetic; however, consider potential wind loading implications depending on your location and the size of the panels.
Preparing the Building’s Surface
The method of surface preparation depends on the existing building material. Proper preparation ensures a secure and lasting installation.
For wood surfaces, ensure the wood is sound, free of rot or decay. Repair any damaged areas and ensure the surface is clean and dry. For brick surfaces, clean the brick thoroughly and ensure it is free of loose mortar. You may need to use a furring strip system to create a level surface for the Hardie Plank. For concrete or stucco surfaces, ensure the surface is clean, dry, and free of any loose or crumbling material. You may need to use a furring strip system to create a level surface as well.
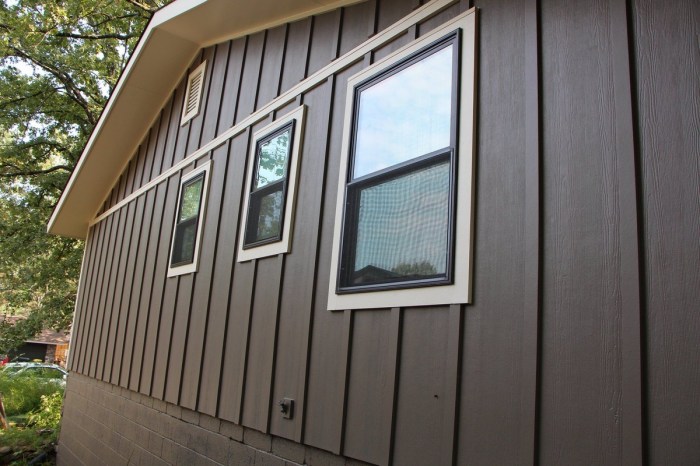
Installation Techniques
Installing Hardie Plank siding is a straightforward process, but proper technique is crucial for a long-lasting, attractive finish. This section details the key steps involved, from installing starter strips to securing the planks themselves. Remember to always consult the manufacturer’s instructions for the most accurate and up-to-date information.
Installing Starter Strips and J-Channels
Starter strips and J-channels provide a clean, consistent starting point for your Hardie Plank installation and allow for proper drainage. Starter strips are installed at the bottom of the wall, creating a level base for the first row of siding. J-channels are used around windows and doors to create a neat transition between the siding and the trim. Begin by measuring and cutting the starter strips or J-channels to the required lengths. Ensure they are level and plumb before securing them to the sheathing using appropriate fasteners, spaced according to manufacturer recommendations. Proper installation ensures water won’t be trapped behind the siding.
Cutting and Fitting Hardie Plank Around Windows and Doors
Precise cutting is essential for a professional-looking finish around windows and doors. Measure carefully, taking into account the window or door frame and any existing trim. Use a circular saw with a fine-tooth blade for clean cuts. Pre-drill holes to prevent splitting, particularly in tighter curves. For complex cuts, consider using a jigsaw for greater maneuverability. Once cut, test-fit the pieces before applying any adhesive or fasteners. This ensures a snug, watertight fit.
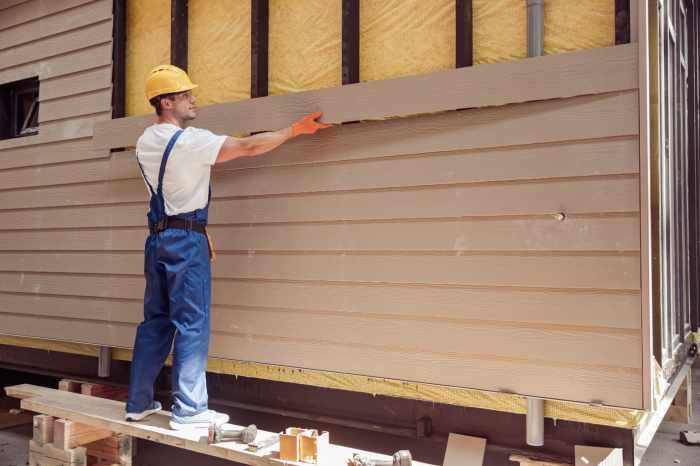
Fastening Hardie Plank to the Building Structure
Proper fastening is critical for long-term durability and weather resistance. Use galvanized nails specifically designed for Hardie Plank siding. These nails are corrosion-resistant and help prevent damage from moisture. Nail placement is crucial: aim for the center of the nail holes pre-drilled in the siding. Maintain consistent nail spacing as specified by the manufacturer, usually around 6 inches apart, to prevent buckling or warping. Avoid overdriving nails, as this can damage the siding and compromise its weather resistance. Always drive nails straight to avoid damaging the siding.
Comparison of Fastening Methods
While nails are the most common fastening method, other options exist, each with advantages and disadvantages. Nails offer a cost-effective and relatively quick installation. However, improper nailing can lead to damage. Construction adhesive can provide additional security and help prevent movement, particularly in windy areas, but it adds to the installation time and cost. A combination of nails and adhesive is often recommended for optimal performance in challenging conditions.
Nail Type and Spacing for Hardie Plank Applications
| Hardie Plank Application | Nail Type | Nail Spacing (inches) | Additional Notes |
|---|---|---|---|
| Standard Lap Siding | 8d Galvanized Ring Shank Nails | 6 | Avoid overdriving nails. |
| Vertical Siding | 8d Galvanized Ring Shank Nails | 6 | Ensure proper alignment. |
| Soffit and Fascia | 6d Galvanized Ring Shank Nails | 4-6 | Use shorter nails to avoid penetration. |
| Around Windows and Doors | 6d Galvanized Ring Shank Nails | 4-6 | Pre-drill holes to prevent splitting. |
Handling & Cutting Hardie Plank

Source: storables.com
Hardie Plank, while durable, requires careful handling and precise cutting to avoid damage and ensure a professional-looking finish. Proper techniques will minimize waste and maximize the lifespan of your siding project. Let’s explore best practices for both handling and cutting this popular fiber cement product.
Hardie Plank Handling Best Practices
Safe and proper handling prevents chipping, cracking, and other damage that can compromise the integrity of the siding and lead to costly repairs or replacements. Always store Hardie Plank flat, on a clean, dry surface, preferably off the ground, to prevent moisture absorption and warping. Avoid dragging or dropping the planks. When carrying them, ensure a firm grip to prevent accidental drops. For longer planks, consider using a helper to avoid strain and accidental damage. Using appropriate lifting techniques is vital to avoid injury.
Cutting Hardie Plank: Methods and Techniques
Several methods exist for cutting Hardie Plank, each with its advantages and disadvantages. The choice depends on the complexity of the cut and the tools available.
Circular Saw Cutting
A circular saw, equipped with a carbide-tipped blade specifically designed for fiber cement, is the most efficient method for cutting straight lines and making bulk cuts. Ensure the blade is sharp and properly adjusted to prevent splintering. Use a slow, steady speed and support the plank firmly to maintain a clean cut. A good quality blade designed for fiber cement is essential.
Hand Saw Cutting
For intricate cuts or when working in confined spaces, a hand saw can be used. A fine-toothed blade is recommended for cleaner cuts and less splintering. This method requires more time and effort but offers greater control for precise cuts, particularly for curves or angles. Patience and a steady hand are key to success.
Safety Precautions for Cutting Hardie Plank
Cutting Hardie Plank generates fine dust that is irritating to the lungs and eyes. Always wear a dust mask rated for fine particles (N95 or better) and safety glasses. Hearing protection is also recommended, especially when using power tools. Ensure the work area is well-ventilated to reduce dust accumulation. Always disconnect power tools before making adjustments or changing blades.
Visual Guide: Cutting Hardie Plank Safely
The visual guide would show two panels side-by-side. The left panel depicts improper cutting techniques: a worker without safety glasses or a dust mask, using a dull blade on a circular saw, cutting a plank unsupported and at high speed, resulting in a splintered and uneven cut. Dust is billowing around the worker. The right panel showcases proper cutting techniques: a worker wearing safety glasses, a dust mask, and hearing protection, using a sharp carbide-tipped blade on a circular saw, firmly supporting the plank with a straight edge as a guide, and cutting at a slow, controlled speed. The cut is clean and straight, with minimal dust. Both panels clearly label the safe and unsafe practices.
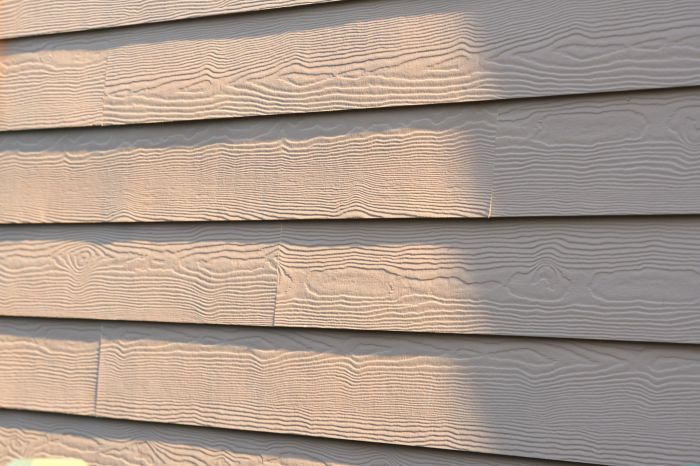
Finishing Touches & Caulking

Source: architecturesideas.com
Now that the main installation of your Hardie Plank siding is complete, it’s time to focus on the details that will make your project look professional and last for years to come. This involves adding trim, carefully caulking all seams and joints, and performing a final inspection. Paying close attention to these finishing touches is crucial for preventing water damage and ensuring a beautiful, long-lasting result.
Proper caulking is arguably the most important aspect of finishing your Hardie Plank installation. It creates a waterproof barrier, protecting your home from moisture intrusion, which can lead to rot, mold, and other costly repairs. Using the right type of caulk and applying it correctly will significantly extend the life of your siding.
Installing Trim and Accessories
Trim pieces around windows, doors, and corners not only enhance the aesthetic appeal but also provide crucial protection against water damage. These pieces act as a transition point between the siding and other building elements, creating a neat and finished look. Use pre-cut or custom-cut trim pieces specifically designed for Hardie Plank. Ensure a tight fit and secure fastening, using appropriate nails or screws. Remember to leave expansion gaps as specified by the manufacturer’s instructions to allow for seasonal movement. For corners, consider using corner trim pieces for a seamless and professional finish, avoiding the need for multiple cuts and ensuring a weathertight seal.
Caulking Techniques and Materials
Choosing the right caulk is essential for long-term protection. For Hardie Plank, a high-quality, paintable, exterior-grade acrylic latex caulk is generally recommended. This type of caulk offers good adhesion, flexibility, and paintability, allowing it to withstand the expansion and contraction of the siding throughout the year. Avoid using silicone caulk, as it can prevent proper adhesion of paint. When applying caulk, use a caulking gun and a smoothing tool to create a neat, consistent bead. Ensure complete coverage of all seams and joints, paying particular attention to areas around windows, doors, and corners. Allow the caulk to cure completely before painting. Properly caulked joints are key to preventing water infiltration and protecting your investment.
Finishing the Installation and Inspection
Once all trim and caulking are complete, take some time to thoroughly clean the installation area. Remove any debris, excess caulk, or stray nails. A final inspection should include checking for any gaps, loose pieces, or areas where additional caulking might be needed. Inspect all seams, corners, and areas around windows and doors for any signs of water intrusion. This thorough inspection ensures a long-lasting, beautiful, and watertight installation.
Common Mistakes and Solutions
It’s helpful to be aware of common mistakes made during Hardie Plank installation to avoid them in your project.
- Mistake: Inadequate caulking around windows and doors. Solution: Carefully recaulk all areas, ensuring complete coverage and a smooth, consistent bead.
- Mistake: Using incorrect fasteners. Solution: Use only the fasteners recommended by the manufacturer for Hardie Plank siding.
- Mistake: Not leaving sufficient expansion gaps. Solution: Refer to the manufacturer’s instructions for appropriate expansion gap sizes and ensure they are maintained throughout the installation.
- Mistake: Failing to properly prepare the surface before installation. Solution: Always ensure the underlying surface is clean, dry, and free of debris before installing Hardie Plank.
- Mistake: Using inappropriate caulk. Solution: Use a high-quality, paintable, exterior-grade acrylic latex caulk specifically designed for exterior applications.
Specific Installation Scenarios: How To Install Hardie Plank
Source: thespruce.com
Installing Hardie Plank siding isn’t always a straightforward process. The best approach depends heavily on the existing substrate and the complexities of your home’s architecture. Understanding these variations is key to a successful and long-lasting installation.
Hardie Plank Installation on Different Building Materials
Hardie Plank can be installed over various substrates, each requiring a slightly different approach. Proper preparation is crucial regardless of the underlying material. For example, ensuring a solid, level surface is paramount for preventing future problems.
- Wood Framing: This is the most common scenario. Ensure the framing is properly spaced and straight, with sheathing that’s sound and free of rot or damage. Use appropriate fasteners for the sheathing type. Remember to leave expansion gaps according to manufacturer’s instructions.
- Concrete: Concrete requires a different approach. You’ll likely need to install furring strips to create a nailing surface for the Hardie Plank. This provides the necessary spacing for expansion and allows for a more even surface. Use corrosion-resistant fasteners designed for concrete.
Hardie Plank Installation Over Existing Siding
Installing Hardie Plank over existing siding can save time and money, but it’s important to assess the condition of the existing siding first. Damaged or deteriorated siding needs to be removed and replaced before installing the new Hardie Plank. This ensures a proper and long-lasting installation.
- Assessment: Carefully inspect the existing siding for damage, rot, or loose areas. Any significant issues must be addressed before proceeding.
- Preparation: Clean the existing siding thoroughly to remove dirt, debris, and loose paint. Consider applying a primer for better adhesion if needed.
- Installation: Install furring strips if necessary to create a proper nailing surface and maintain appropriate spacing for expansion and ventilation. Follow the manufacturer’s instructions for fastener placement and spacing.
Installing Hardie Plank in Difficult-to-Reach Areas
Reaching those awkward spots during installation can be challenging. Careful planning and the right tools can make the job significantly easier. For instance, pre-cutting planks to size before attempting to install them in tight spaces can save a lot of time and frustration.
- Scaffolding/Ladders: Use appropriate scaffolding or ladders to safely access high or hard-to-reach areas. Always prioritize safety.
- Pre-Cutting: Cut planks to size on the ground whenever possible. This minimizes the need for on-site cutting in awkward positions.
- Specialized Tools: Consider using specialized tools like small hand saws or reciprocating saws with long blades for intricate cuts.
Installing Hardie Plank Around Complex Architectural Features
Dormers, bay windows, and other complex features require careful planning and precise cutting. Take your time, measure twice, and cut once! Use templates where necessary to ensure accurate cuts and a clean, professional finish.
- Templates: Create cardboard templates for complex cuts to ensure accuracy. This is especially helpful around curved areas like bay windows.
- J-Channel & Trim: Utilize J-channel and trim pieces to neatly finish around corners, windows, and other architectural details.
- Careful Measurement: Accurate measurements are crucial for a seamless installation. Take your time and double-check your measurements before making any cuts.
Final Conclusion
Installing Hardie Plank siding is a rewarding project that significantly enhances your home’s appearance and durability. By following the steps outlined in this guide, paying close attention to detail, and prioritizing safety, you can achieve a professional-looking finish. Remember, proper preparation and attention to cutting and fastening techniques are key to a successful installation. So grab your tools, follow the steps, and enjoy the transformation of your home’s exterior!
Query Resolution
Can I install Hardie Plank over existing vinyl siding?
Generally, yes, but careful inspection for damage and proper preparation are crucial. You may need to remove severely damaged areas or address any underlying moisture issues.
What type of caulk should I use with Hardie Plank?
Use a high-quality, paintable exterior-grade caulk specifically designed for use with fiber cement siding. Check the manufacturer’s recommendations.
How long does Hardie Plank siding typically last?
With proper installation and maintenance, Hardie Plank siding can last for 30-50 years or more.
What’s the best way to clean Hardie Plank after installation?
A simple rinse with water is usually sufficient. For tougher stains, use a mild soap and water solution. Avoid harsh chemicals.
Do I need special tools to cut Hardie Plank?
While a circular saw with a carbide-tipped blade is recommended for speed and accuracy, a hand saw can also be used. Always wear appropriate safety gear.