How Do You Install Hardie Plank Siding?
How do you install Hardie Plank siding? It’s a question many homeowners ask when considering this durable and attractive exterior cladding. This guide walks you through the entire process, from initial planning and material selection to the final finishing touches. We’ll cover everything from prepping the surface and measuring correctly to mastering tricky cuts around windows and doors. Get ready to transform your home’s exterior with this step-by-step installation guide!
Hardie Plank siding offers a blend of beauty and resilience, making it a popular choice for homeowners. Understanding the different types of Hardie Plank, their pros and cons, and comparing them to alternatives is crucial before starting. Proper preparation, including accurate measurements and a detailed plan, is key to a successful installation. We’ll explore the tools and techniques needed for each stage, from installing the first course to handling complex areas like corners and curved walls. Finally, we’ll discuss essential maintenance practices to keep your siding looking great for years to come.
Understanding Hardie Plank Siding
Hardie Plank siding, manufactured by James Hardie, is a popular choice for exterior cladding due to its durability and aesthetic appeal. It’s a fiber cement product, meaning it’s a composite material made from cement, cellulose fibers, and other additives. Understanding its different types, advantages, and disadvantages compared to other options is crucial for making an informed decision for your home.
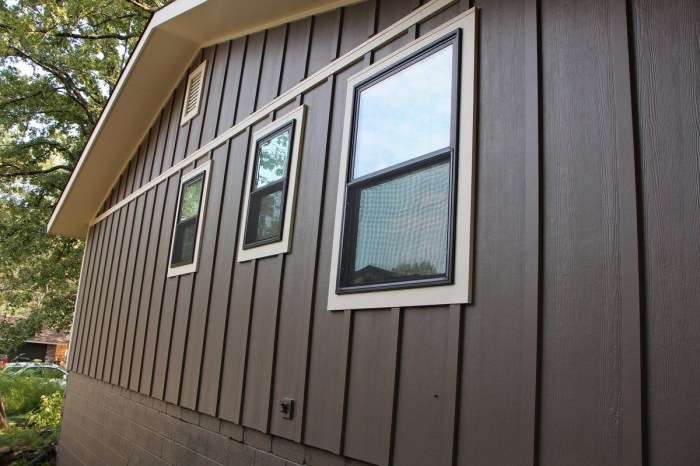
Hardie Plank Siding Types
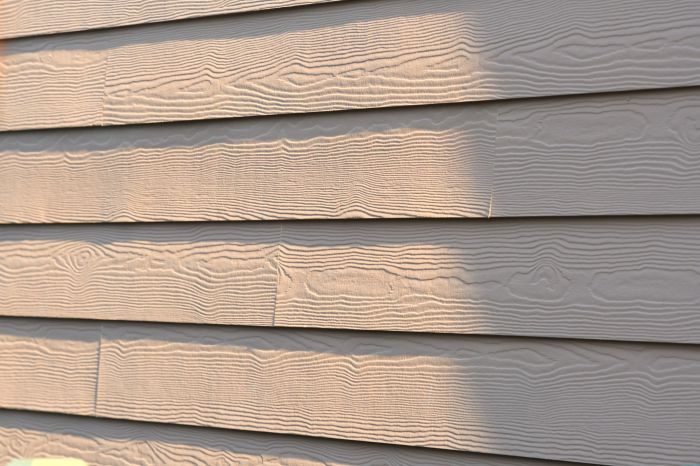
Hardie Plank offers several siding profiles to match various architectural styles. These profiles differ primarily in their appearance, offering choices to mimic traditional wood lap siding or provide more modern, sleek looks. For example, the standard Hardie Plank offers a classic, slightly textured look, while other lines might feature a smoother finish or a more pronounced shadow line between planks. The specific availability of profiles can vary by region and supplier. Choosing the right profile depends heavily on personal preference and the overall style of the house.
Advantages of Hardie Plank Siding
Hardie Plank boasts several advantages over other siding materials. Its primary benefit is its exceptional durability. Fiber cement is highly resistant to rot, insect damage, and fire, significantly extending the siding’s lifespan. It also requires less maintenance than wood siding, reducing long-term costs. Furthermore, Hardie Plank offers a wide array of colors and finishes, providing significant design flexibility. Its ability to withstand harsh weather conditions, including strong winds and heavy rain, makes it a reliable choice in various climates. Finally, it offers good insulation properties, contributing to energy efficiency.
Disadvantages of Hardie Plank Siding
Despite its many advantages, Hardie Plank isn’t without drawbacks. It’s more expensive than vinyl or aluminum siding, representing a higher initial investment. Installation can also be more complex and time-consuming than other materials, requiring specialized tools and expertise. The weight of Hardie Plank can also pose challenges during installation, requiring more physical effort. Finally, fiber cement is brittle and can be susceptible to cracking if mishandled during installation or subjected to significant impact.
Hardie Plank Siding Compared to Other Cladding
Compared to wood siding, Hardie Plank offers superior durability and requires less maintenance. However, wood provides a more natural aesthetic. Against vinyl siding, Hardie Plank is more expensive but significantly more durable and resistant to damage. Aluminum siding is lighter and easier to install than Hardie Plank, but it’s less durable and can dent easily. Ultimately, the best choice depends on the budget, desired aesthetic, and the specific needs and conditions of the project.
Necessary Tools and Materials for Hardie Plank Installation
Successful Hardie Plank installation requires specific tools and materials. These include measuring tapes, levels, circular saws (with appropriate blades for fiber cement), nail guns (specifically designed for fiber cement nails), safety glasses, respirators (to mitigate dust inhalation), and appropriate fasteners. The amount of siding, trim, and flashing needed will depend on the size and complexity of the project. It’s crucial to carefully calculate the necessary quantities to avoid delays and material waste. In addition to the siding itself, you’ll need starter strips, J-channel, corner trim, and other related components to create a complete and professional-looking finish.
Preparation Before Installation

Source: storables.com
Getting started right is crucial for a successful Hardie Plank siding installation. Proper preparation saves time, avoids costly mistakes, and ensures a long-lasting, beautiful finish. This section covers the essential steps to prepare your home’s exterior for Hardie Plank siding.
Surface Preparation
Before you even think about attaching the first plank, you need to thoroughly assess and prepare the existing wall surface. This involves removing any loose or damaged materials, such as old siding, flashing, or trim. Any areas of rot or water damage must be addressed and repaired before installing the new siding. This might involve replacing damaged wood, applying waterproof sealant, and ensuring a solid, level substrate for the Hardie Plank. Remember, a well-prepared surface is the foundation for a professional-looking installation. Don’t skip this step!
Calculating Siding Requirements
Accurately measuring and calculating the amount of Hardie Plank siding you need is essential to avoid unnecessary costs and delays. Start by carefully measuring the total area of the walls to be sided. Remember to account for windows, doors, and other openings. Next, consider the size of the Hardie Plank panels you’ve chosen. Most panels are sold in 12-foot lengths, but this varies. Waste factor—you’ll need extra material for cuts, mistakes, and potential damage. A general rule of thumb is to add 10-15% extra to your total calculated area. For example, if your measurements indicate you need 100 square feet, purchase at least 110-115 square feet to account for waste. Always double-check your calculations before purchasing.
Creating an Installation Plan
A detailed plan is your roadmap to a successful installation. This should include scaled drawings of the house’s exterior, indicating the location of windows, doors, corners, and other features. Mark the placement of each Hardie Plank panel, taking into account the desired layout and the direction of the siding. This plan helps visualize the installation process and ensures efficient material usage. Consider using different colors or textures to enhance the design; mark these on your plan as well. Include notes about specific challenges, such as difficult angles or areas requiring special attention. A well-thought-out plan prevents on-site confusion and saves valuable time.
Building a Mock-Up Section
Before tackling the entire house, it’s highly recommended to build a small mock-up section. This allows you to practice cutting, fitting, and fastening the Hardie Plank panels. This is especially important if you’re unfamiliar with the installation process. Use scrap materials to simulate different aspects of the installation, including corners, windows, and other features. This practice run helps you refine your techniques, identify potential problems, and improve your efficiency before committing to the main project. A successful mock-up provides confidence and contributes to a smoother, more professional-looking final product. Consider creating a mock-up section that includes a corner and a window to practice these more challenging aspects of installation.
Installing Hardie Plank Siding
Source: thespruce.com
Installing Hardie Plank siding is a rewarding DIY project that can significantly enhance your home’s curb appeal and protect it from the elements. However, it requires careful planning and execution to achieve a professional-looking finish. This section provides a step-by-step guide to ensure a successful installation.
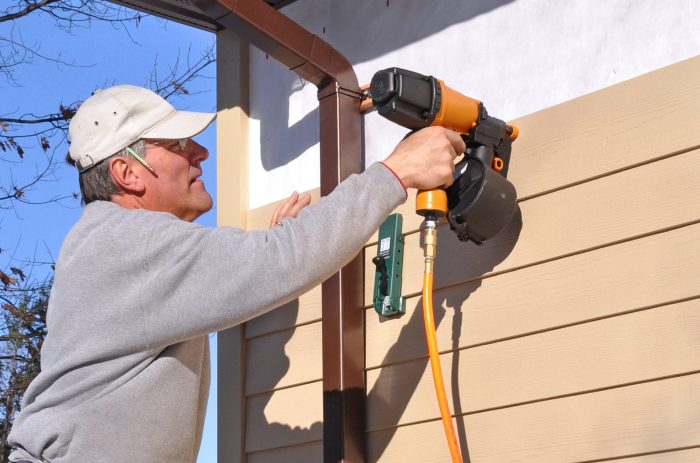
Installing the First Course of Hardie Plank Siding
The first course sets the standard for the entire installation. Accuracy here is crucial for a straight and even final result. Begin by establishing a level starting point using a chalk line snapped along the bottom edge of the sheathing. This line will guide the placement of your first row of siding. Remember to account for the final reveal (the exposed portion of the siding) at the bottom. The bottom edge of the first course should be flush with the bottom of the house’s sheathing.
Cutting and Fitting Hardie Plank Around Windows and Doors
Precise cuts are essential for a clean, professional look around openings. Measure carefully and use a sharp utility knife or circular saw with a fine-tooth blade for accurate cuts. Pre-drilling pilot holes before fastening is vital to prevent splitting. Remember to always leave a gap between the siding and the window or door frame for expansion and contraction. This gap will usually be the same as the recommended nail spacing. Consider using trim pieces to create a neat finish around the window and door frames.
Installing Corner Pieces and Trim
Corner pieces and trim add a polished look and protect the edges of the siding. Start by installing the corner pieces, ensuring they are plumb and level. Then, install the trim pieces around windows and doors, ensuring a tight fit and consistent spacing. Use appropriate fasteners for each component, and remember to caulk all joints for weather protection.
Handling Different Siding Profiles and Overlaps
Hardie Plank siding comes in various profiles, each requiring slightly different installation techniques. Always refer to the manufacturer’s instructions for specific guidance on overlap, nailing patterns, and fastening techniques for your chosen profile. Generally, the overlap is specified in the manufacturer’s instructions, but typically is a few inches to allow for proper weather protection and aesthetic appeal. Consistent overlaps are key to a professional appearance.
| Step Number | Description | Tools Needed | Image Description |
|---|---|---|---|
| 1 | Establish a level starting point using a chalk line. Install the first course of siding, ensuring it’s level and flush with the bottom sheathing. | Chalk line, level, measuring tape, siding nails, nail gun (optional), safety glasses | A close-up image showing a perfectly level first course of Hardie Plank siding installed along a chalk line, with nails neatly spaced and countersunk. The bottom edge of the siding is flush with the house’s sheathing. |
| 2 | Measure and cut Hardie Plank to fit around windows and doors. Pre-drill pilot holes to prevent splitting. Leave expansion gaps. | Measuring tape, utility knife or circular saw, drill, pilot bits, siding nails, safety glasses | An image showing precisely cut Hardie Plank pieces fitted neatly around a window frame, with visible expansion gaps between the siding and the frame. Pilot holes are visible. |
| 3 | Install corner pieces and trim, ensuring they are plumb and level. Caulk all joints. | Corner pieces, trim pieces, caulk gun, caulking, level, siding nails, nail gun (optional), safety glasses | An image showcasing perfectly installed corner pieces and trim, with smooth, caulked joints. The corner pieces are plumb and aligned neatly. |
| 4 | Install subsequent courses of siding, maintaining consistent overlaps and nailing patterns as specified by the manufacturer. | Hardie Plank siding, siding nails, nail gun (optional), level, measuring tape, safety glasses | An image depicting several courses of Hardie Plank siding installed with consistent overlaps and even nailing. The image highlights the uniformity of the installation. |
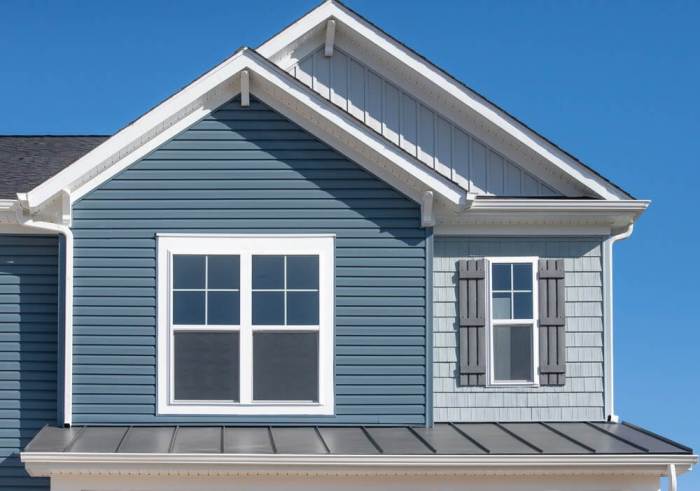
Finishing Touches and Maintenance

Source: advanceroofingllc.com
After installing your Hardie Plank siding, the final steps ensure a long-lasting, beautiful exterior. Proper caulking, painting, and a consistent maintenance schedule are key to protecting your investment and maintaining its curb appeal. Neglecting these steps can lead to premature wear and costly repairs down the line.
Caulking and Sealing Gaps and Joints
Caulking is crucial for preventing water intrusion, a major cause of damage to siding. All gaps and joints between siding panels, around windows and doors, and at the base of the siding should be carefully sealed. Use a high-quality, paintable caulk specifically designed for exterior use and that is compatible with fiber cement. Apply the caulk smoothly and evenly, ensuring complete coverage of the gap. Smooth the caulk with a wet finger or a caulk smoothing tool for a neat, professional finish. Allow the caulk to fully cure before painting. Failing to properly caulk can lead to water damage, rot, and insect infestation.
Painting or Staining Hardie Plank Siding
Hardie Plank siding can be painted or stained, offering a wide range of color options to complement your home’s style. Before applying any paint or stain, ensure the siding is clean and dry. Prime the siding first, especially if it’s new or unpainted. Use a high-quality exterior paint or stain designed for fiber cement siding. Follow the manufacturer’s instructions carefully for application and drying times. Multiple thin coats are generally better than one thick coat to prevent cracking and peeling. Choose a color that complements your home’s architectural style and surrounding landscape. Regularly repainting or restaining will extend the life of your siding and maintain its appearance.
Hardie Plank Siding Maintenance Schedule
Regular maintenance is essential to prolong the life of your Hardie Plank siding. A simple annual inspection can prevent minor problems from becoming major headaches. Here’s a suggested maintenance schedule:
- Annual Inspection: Visually inspect the siding for any signs of damage, such as cracks, loose panels, or areas of water damage. Check caulking for any gaps or deterioration.
- Cleaning: Wash the siding with a mild detergent and water solution at least once a year, using a soft-bristled brush or pressure washer (low pressure setting). This removes dirt, mildew, and other debris. A power washer used at too high of a setting can damage the siding. Imagine a powerful jet of water striking the surface, potentially causing pitting or chipping.
- Re-caulking: Replace any damaged or deteriorated caulk as needed. This prevents water intrusion and keeps your home protected.
- Repainting/Restining: Repaint or restain the siding every 5-10 years, or as needed, depending on the climate and the type of paint or stain used. Consider the intensity of sunlight in your region. In areas with high UV exposure, more frequent repainting might be necessary. For instance, a south-facing wall in Arizona will likely need repainting sooner than a north-facing wall in Oregon.
Common Problems and Troubleshooting Techniques
Some common issues with Hardie Plank siding include cracks, loose panels, and water damage. Cracks can be repaired with a fiber cement patching compound. Loose panels may need to be re-nailed or replaced. Water damage often requires more extensive repairs, possibly involving replacing damaged sections of siding. Early detection and prompt repairs are crucial to prevent further damage. For example, a small crack ignored might lead to water penetration, causing rot and requiring replacement of a larger section of siding.
Preventative Maintenance Tasks
Regular maintenance prevents major issues and extends the lifespan of your Hardie Plank siding.
- Annual Cleaning (Image: A person gently washing Hardie Plank siding with a soft brush and soapy water. The image shows a clear, sunny day and emphasizes the gentle cleaning process.) A yearly cleaning removes dirt and grime, preventing the buildup of mildew and algae. This keeps the siding looking its best and helps prevent premature deterioration.
- Caulk Inspection (Image: A close-up shot highlighting the caulking around a window or door frame. The image shows smooth, intact caulk, indicating proper sealing.) Regular inspection of caulking ensures it’s intact and performing its sealing function. Cracked or missing caulk should be immediately replaced to prevent water penetration.
- Siding Inspection (Image: A wide shot showing a person carefully inspecting Hardie Plank siding for any cracks, damage, or loose panels. The image should highlight a methodical approach to the inspection.) A thorough annual inspection for damage, such as cracks or loose panels, allows for prompt repairs, preventing larger problems down the line.
Advanced Installation Techniques: How Do You Install Hardie Plank Siding
Installing Hardie Plank siding on anything beyond simple, flat walls requires extra skill and planning. This section covers techniques for tackling more challenging installations, ensuring a professional and long-lasting finish. We’ll explore working with curves, installing over existing siding, and utilizing specialized tools to overcome common obstacles.
Hardie Plank Installation on Curved Walls
Working with curved walls presents a unique challenge. Instead of straight cuts, you’ll need to carefully measure and cut the planks to conform to the curve’s radius. Pre-bending the planks slightly before installation can help achieve a smoother, more natural-looking curve. This often involves scoring the back of the plank to allow for more flexibility without cracking. Accurate measurements are critical; using a flexible measuring tape and marking the planks carefully will minimize waste and ensure a proper fit. Overlapping planks on a curve should be done meticulously, paying close attention to maintaining consistent spacing and avoiding gaps. Remember that the tighter the curve, the more frequent the cuts will need to be, potentially increasing material usage. Consider using thinner planks for tighter curves to manage flexibility better.
Installing Hardie Plank Over Existing Siding, How do you install Hardie Plank siding
Installing Hardie Plank over existing siding is possible, but it adds complexity. First, a thorough assessment of the existing siding is necessary to identify any damage or rot that needs addressing before installation. Proper preparation is key; the existing siding needs to be clean, secure, and structurally sound. Any loose or damaged sections must be repaired or replaced. You may need to add furring strips to create a level surface for the new siding if the existing surface is uneven. This creates a space for ventilation and helps to avoid moisture issues. Remember to account for the added thickness of the new siding when determining the required amount of material. Installing Hardie Plank over existing vinyl siding often requires special attention to ensure proper ventilation and avoid trapping moisture behind the new siding.
Specialized Tools and Techniques for Difficult Installations
Certain tools significantly simplify challenging installations.
| Tool Name | Description of Use |
|---|---|
| Jigsaw with fine-tooth blade | Ideal for cutting curves and intricate shapes in Hardie Plank siding. The fine-tooth blade minimizes chipping and ensures a clean cut. |
| Circular Saw with fine-tooth blade | Useful for straight cuts, especially when cutting multiple planks to the same length. A fine-tooth blade is crucial for minimizing splintering. |
| Power Miter Saw | Provides accurate cuts, particularly for mitered corners and joints, improving the overall appearance of the finished installation. |
| Nail Gun | Significantly speeds up the installation process, ensuring consistent nail placement and reducing the risk of damage to the siding. |
| Level | Essential for ensuring that the siding is installed straight and plumb, maintaining a professional and even appearance. |
| Measuring Tape | Accurate measurements are crucial for successful Hardie Plank installation; using a high-quality tape measure ensures precision. |
Different Installation Patterns and Their Visual Impact
The visual impact of Hardie Plank siding can be significantly altered by choosing different installation patterns. A traditional horizontal installation provides a clean, classic look. Vertical installation creates a more modern and contemporary aesthetic. A combination of horizontal and vertical patterns, or even diagonal patterns, can be used to create unique and eye-catching designs. The choice of pattern depends largely on personal preference and the architectural style of the building. For instance, a vertical pattern might emphasize the height of a building, while a horizontal pattern can make it appear wider.
Safety Precautions

Source: hubspotusercontent30.net
Installing Hardie Plank siding involves working at heights, handling potentially hazardous materials, and using power tools. Prioritizing safety is crucial to prevent injuries and ensure a successful project. This section details essential safety precautions to follow throughout the installation process.
Personal Protective Equipment (PPE)
Proper personal protective equipment is paramount for protecting yourself from potential hazards. This includes wearing safety glasses or goggles to protect your eyes from flying debris, dust, and chemical splashes. A dust mask or respirator is necessary to filter out fine particles generated during cutting and sanding. Hearing protection, such as earplugs or earmuffs, is vital to reduce noise exposure from power tools. Work gloves provide protection for your hands from cuts, splinters, and abrasions. Finally, sturdy work boots with slip-resistant soles will provide stability and protect your feet from falling objects or sharp materials. Always ensure your PPE is in good condition and fits correctly before starting any work.
Handling and Disposal of Hazardous Materials
Hardie Plank siding installation may involve working with materials that require careful handling and disposal. Cutting the siding generates dust that contains crystalline silica, a known respiratory hazard. Always use appropriate dust collection systems, such as a shop vacuum with a HEPA filter, to minimize dust exposure. When working with cutting fluids or other chemicals, follow the manufacturer’s instructions for safe handling and disposal. Never mix different chemicals, and always store them in properly labeled containers in a well-ventilated area. Dispose of hazardous waste according to local regulations and guidelines; this might involve contacting your local waste management facility for proper disposal methods.
Working at Heights Safety Tips
Working at heights presents significant risks, and adhering to these safety procedures is non-negotiable:
- Always use a stable and properly secured scaffold or ladder that extends at least three feet above the roofline or working platform. Ensure the ladder is positioned on a level surface and is not overloaded.
- Use a safety harness and fall protection system whenever working at heights above six feet. This system should be anchored to a secure point and regularly inspected for damage.
- Inspect all equipment before use, ensuring that ladders, scaffolding, and safety harnesses are in good condition and free from defects.
- Never work alone at heights. Always have a spotter or partner present to assist in case of an emergency.
- Be aware of weather conditions. Do not work at heights during inclement weather such as high winds or rain.
Final Conclusion
Installing Hardie Plank siding might seem daunting at first, but with careful planning and a methodical approach, it’s a manageable DIY project. Remember, safety is paramount; always wear appropriate PPE and follow safe working practices. By following the steps outlined in this guide, you’ll be well-equipped to achieve a professional-looking finish that enhances your home’s curb appeal and protects it from the elements for years to come. So, grab your tools, and let’s get started on transforming your home’s exterior!
Q&A
Can I install Hardie Plank over existing siding?
Generally, yes, but it depends on the condition of the existing siding. It needs to be sound and securely attached. You may need extra preparation, such as adding furring strips for a level surface.
What’s the best way to clean Hardie Plank siding?
Regularly rinse with a garden hose to remove dirt and debris. For tougher stains, use a mild detergent solution and a soft brush. Avoid pressure washers, which can damage the siding.
How long does Hardie Plank siding last?
With proper installation and maintenance, Hardie Plank siding can last for 30-50 years or even longer.
What type of paint is best for Hardie Plank?
Use a high-quality acrylic latex paint specifically designed for exterior use and compatible with fiber cement.
Do I need special tools for Hardie Plank installation?
While standard carpentry tools are sufficient for much of the work, specialized tools like a circular saw with a fine-tooth blade and a nail gun will make the job easier and faster.