How to Put Up Hardie Siding
How to put up Hardie siding? It might sound daunting, but with the right preparation and technique, installing this durable and attractive siding is a manageable DIY project. This guide will walk you through each step, from planning and material selection to the final finishing touches, ensuring a professional-looking result that will protect your home for years to come. We’ll cover everything from choosing the right type of Hardie siding for your needs to mastering the art of precise cutting and installation.
We’ll delve into the specifics of preparing your exterior walls, installing sheathing and underlayment, and accurately fitting the siding around windows and doors. We’ll also address important details like proper nailing techniques, caulking for weatherproofing, and identifying common mistakes to avoid. By the end, you’ll have the confidence to tackle this project and enjoy the beauty and longevity of Hardie siding on your own home.
Planning and Preparation
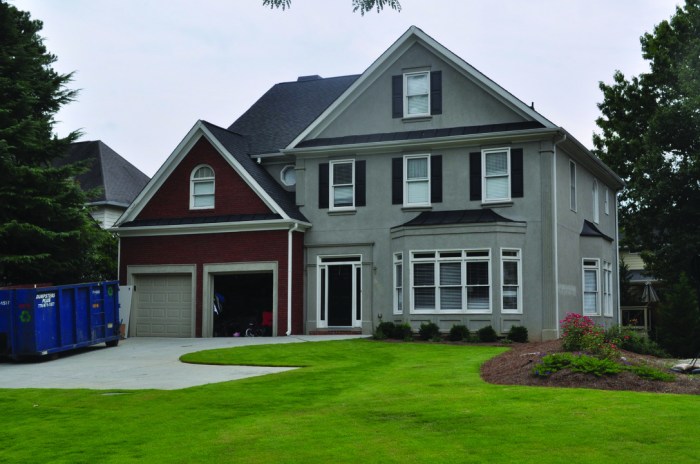
Source: lifetime-exteriors.net
Getting started with Hardie siding installation requires careful planning and preparation. This ensures a smooth, efficient, and ultimately successful project. Failing to adequately prepare can lead to costly mistakes and delays. Taking the time upfront will save you headaches down the line.
Necessary Tools and Materials
Proper tools and materials are crucial for a professional-looking and long-lasting installation. Having everything on hand before you begin will prevent interruptions and ensure a consistent workflow. Here’s a list of essentials:
- Measuring tape: Accurate measurements are paramount for precise cuts.
- Circular saw with a fine-tooth blade: Specifically designed for cutting fiber cement siding.
- Safety glasses and hearing protection: Essential for protecting your eyes and ears from flying debris and noise.
- Level: Ensures the siding is installed plumb and straight.
- Hammer and nail gun (optional, but recommended for speed and efficiency): For securing the siding.
- Caulk gun: For sealing gaps and joints.
- Utility knife: For trimming and cutting smaller pieces.
- J-channel, starter strip, and trim pieces: These provide a neat and professional finish.
- Appropriate fasteners: Galvanized nails or screws specifically designed for Hardie siding.
- Hardie siding panels: Choose the type and size that best suits your needs (see table below).
- Primer and paint (if desired): Protect and enhance the appearance of the siding.
Exterior Wall Preparation Checklist
Before installing any siding, the exterior wall must be thoroughly prepared. This step is vital for a secure and lasting installation. Overlooking this can lead to problems down the road. Here’s a step-by-step checklist:
- Inspect the wall for any damage, such as rot, cracks, or loose boards, and repair as needed.
- Remove any existing siding, trim, or other obstructions.
- Clean the wall surface thoroughly to remove dirt, debris, and loose paint.
- Ensure the wall sheathing is sound and securely fastened.
- Install any necessary flashing or water barriers to prevent moisture intrusion.
- Install house wrap, if necessary, to provide additional protection against moisture.
- Inspect and repair any damaged or deteriorated wood framing.
- Install strapping or furring strips if needed to create a level surface for the siding.
Accurate Measurements and Cutting Techniques
Precise measurements are essential for a professional-looking installation. Inaccurate cuts will result in gaps, overlaps, and an unprofessional appearance. Use a measuring tape and always double-check your measurements before cutting. When cutting Hardie siding, use a fine-tooth blade in a circular saw to prevent chipping and cracking. For intricate cuts, a jigsaw might be more suitable. Always wear safety glasses and a dust mask when cutting.
Hardie Siding Types and Applications
Different types of Hardie siding are available, each suited for specific applications. Choosing the right type will ensure the best possible performance and longevity.
| Siding Type | Thickness | Application | Features |
|---|---|---|---|
| HardiePlank® Lap Siding | 0.5″ – 0.75″ | Traditional homes, new construction, renovations | Classic look, durable, low maintenance |
| HardieShingle® Siding | 0.5″ – 0.75″ | Homes with a more rustic or craftsman style | Durable, weather-resistant, simulates natural wood shingles |
| HardiePanel® Vertical Siding | 0.5″ | Modern homes, contemporary designs | Clean lines, sleek appearance, easy installation |
| HardieTrim® Boards | Various | Window and door trim, corners, fascia | Durable, weather-resistant, provides a finished look |
Installing the Sheathing
Getting the sheathing right is crucial for a long-lasting, beautiful Hardie siding job. This step involves preparing the wall for the siding itself, ensuring proper ventilation and a solid, level base. We’ll cover installing house wrap, attaching furring strips, and securing the sheathing to the wall studs.
Before you even think about attaching the Hardie siding, you need to protect your home’s structure and ensure proper ventilation. This is done by installing house wrap or building paper, followed by furring strips.
House Wrap or Building Paper Installation
House wrap or building paper acts as a weather barrier, preventing moisture from penetrating the wall cavity. Start at the bottom of the wall and work your way up, overlapping each sheet by at least 6 inches. Use staples or a pneumatic stapler to secure the wrap to the studs. Make sure the wrap is taut and wrinkle-free to avoid gaps. Pay close attention to corners and window/door openings, ensuring a continuous, sealed layer. Properly sealing these areas prevents water intrusion, which can lead to rot and mold. Remember to always follow the manufacturer’s instructions for the specific product you’re using.
Furring Strip Attachment
Furring strips create a critical air gap between the sheathing and the Hardie siding, allowing for proper ventilation and preventing moisture buildup. These strips are typically 1×2 or 1×3 lumber, spaced according to the manufacturer’s recommendations for your specific Hardie siding product – often around 1/2 inch to 1 inch. Attach the furring strips horizontally to the studs using corrosion-resistant screws. Ensure the strips are level and plumb using a level and plumb bob. Consistent spacing is key to maintaining the air gap and ensuring a uniform surface for the siding. For example, you might use evenly spaced furring strips every 16 inches on center.
Achieving a Level and Plumb Sheathing Surface
A level and plumb sheathing surface is paramount for a professional-looking and structurally sound installation. Before attaching the sheathing, check the wall for any significant irregularities. Minor imperfections can usually be compensated for during the sheathing process, but major deviations might require additional work. Use a level and plumb bob frequently to ensure that each sheet of sheathing is properly aligned. This will prevent issues with the final siding installation. Consider using shims to correct minor imperfections and ensure the sheathing is flush against the wall studs.
Sheathing Fastening
Secure the sheathing to the wall studs using appropriate nails or screws, following the manufacturer’s guidelines for spacing and penetration depth. The sheathing should be firmly attached to prevent movement or sagging. Generally, you should use corrosion-resistant fasteners that are long enough to penetrate at least 1 ½ inches into the studs. Over-driving nails can cause damage to the sheathing, while under-driving can lead to loose sheathing. A nail gun can significantly speed up this process, but proper technique is crucial to avoid damaging the sheathing. Always maintain proper spacing between fasteners to prevent splitting. For example, if using 8d nails, a typical spacing might be 6 inches on center.
Installing the Starter Strip and J-Channel
Getting the starter strip and J-channel installed correctly is crucial for a neat and watertight Hardie siding installation. These components provide a foundation for the rest of your siding and ensure proper alignment and protection against the elements. Think of them as the framing for your siding masterpiece!
The starter strip forms the base for the first row of siding, providing a straight, level edge to begin with. J-channel, on the other hand, creates a neat and weatherproof finish around windows and doors, protecting those areas from water intrusion.
Starter Strip Installation
The starter strip is a thin metal or plastic strip with a lip designed to hold the bottom edge of your first course of siding. Proper installation ensures a straight, even first row and prevents water from seeping behind the siding. Begin by measuring and cutting the starter strip to the length of each wall section. Remember to add a little extra for overlap at the corners. You’ll typically nail or staple the starter strip to the sheathing, ensuring it’s perfectly level and aligned with the bottom edge of the future siding. Use galvanized nails or staples to avoid rust. Spacing is important; too many fasteners could damage the strip, while too few might lead to movement. Aim for approximately 6-8 inches apart.
J-Channel Installation
J-channel is a versatile piece used to create a clean, weather-resistant finish around openings like windows and doors. It’s designed with a lip to cover the edges of the siding and a channel to receive the siding’s end. Accurate measurement and cutting are key here to ensure a snug fit. Before installing the J-channel, ensure the window or door trim is properly installed and level. Position the J-channel around the perimeter of the opening, ensuring the lip faces outward to receive the siding. Secure it to the sheathing with galvanized nails or screws, making sure it’s perfectly aligned and plumb. Overlapping J-channels at corners is essential to create a watertight seal. Again, spacing is important; aim for consistent spacing of approximately 6-8 inches apart.
Alignment and Sealing
Accurate alignment of both the starter strip and J-channel is paramount. Improper alignment can lead to gaps and uneven siding, compromising the aesthetics and weather resistance of your installation. Use a level to ensure both components are perfectly straight and plumb. Once installed, apply a high-quality, paintable exterior-grade caulk to seal any gaps between the components and the sheathing. This prevents water penetration and ensures a long-lasting, weatherproof finish. Pay close attention to the corners and seams of the J-channel, sealing them thoroughly to prevent leaks. This is critical for preventing water damage.
Fastening Methods, How to put up Hardie Siding
Both starter strips and J-channels can be fastened using either nails or screws. Nails are generally quicker for large areas, while screws offer greater holding power and are often preferred in high-wind areas or for larger projects where extra security is desired. Regardless of your chosen method, always use corrosion-resistant fasteners to prevent rust and maintain the integrity of your siding. The choice often comes down to personal preference and the specific requirements of the project and local building codes.
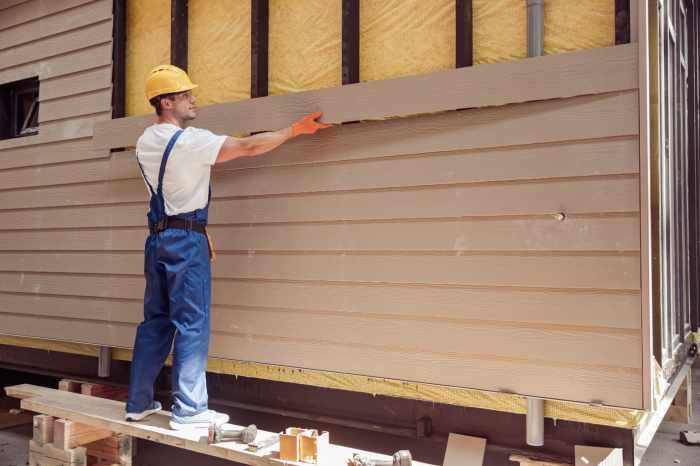
Installing Hardie Siding Panels

Source: squarespace-cdn.com
Now that the prep work is done, it’s time to get into the meat of the project: installing the Hardie siding panels. This process involves a bit of finesse, but with careful attention to detail, you’ll achieve a professional-looking finish. Remember, accuracy and precision are key to a successful installation.
The core principle is overlapping each panel to create a weathertight barrier. This overlap ensures water runs down and away from your home, preventing damage. We’ll cover the specifics of cutting, fastening, and managing tricky areas like corners and openings.
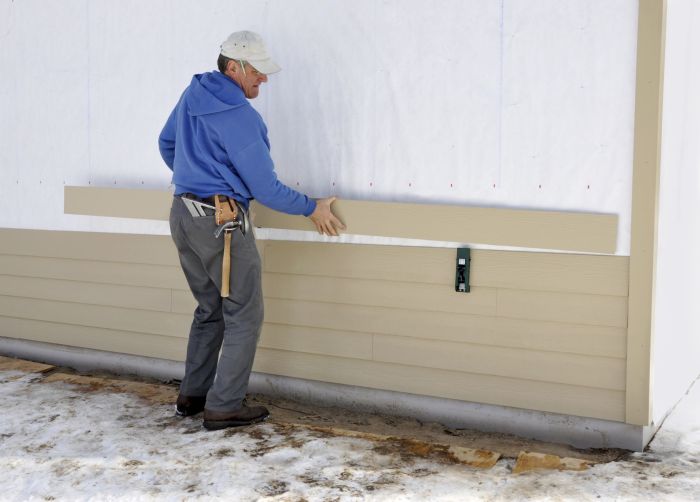
Overlapping Siding Panels
Proper overlapping is crucial for water management. Each subsequent panel should overlap the previously installed panel by the manufacturer’s specified amount, usually around 1/2 inch to an inch. This overlap should be consistent throughout the installation for a uniform look. Imagine it like shingles on a roof – each layer protects the one below. Start at the bottom and work your way up, ensuring each panel is securely fastened. Consistent overlap prevents water penetration and enhances the overall durability of the siding.
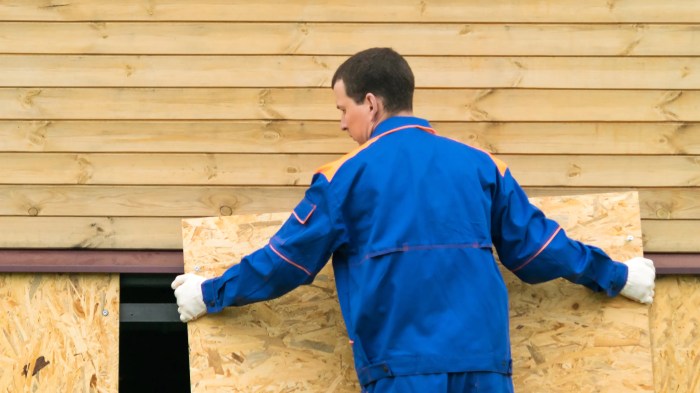
Cutting and Fitting Panels Around Corners and Obstructions
Corners and obstructions require precise cuts. Use a sharp utility knife or circular saw with a fine-tooth blade for clean cuts. For inside corners, measure carefully and cut the panels to fit snugly. Outside corners usually require a separate J-channel or corner trim piece. Before cutting, always double-check your measurements to avoid wasting material. When working around windows and doors, take your time and make multiple test fits before committing to a cut. Precise cuts will minimize gaps and ensure a professional finish. Think of it like a jigsaw puzzle – each piece needs to fit perfectly to complete the picture.
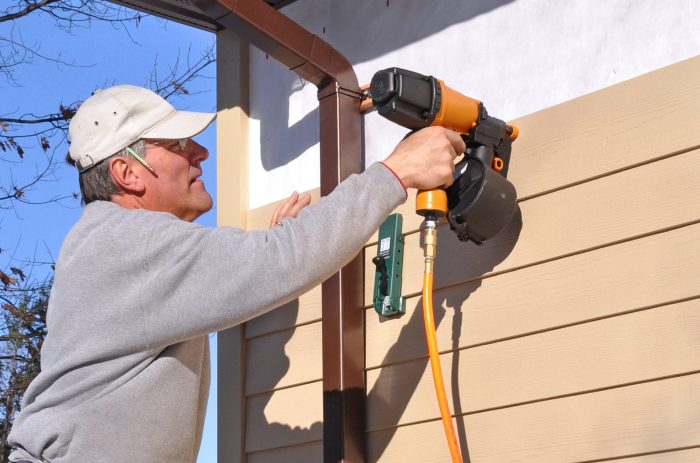
Fastening Panels
Hardie siding is typically fastened using nails or screws. Always use the fasteners recommended by the manufacturer. The nails or screws should be driven straight and flush with the surface of the siding, but not so deeply as to cause dimpling. Avoid overdriving, as this can damage the siding. Proper spacing is also crucial – too close and the siding might crack; too far and it might not be secure enough. The manufacturer’s instructions will provide specific guidelines on nail or screw spacing. Consider using a nail gun for efficiency and consistency, ensuring the nails are driven at the correct angle. A slightly countersunk nail head is best to prevent damage and improve aesthetics.
Installing Siding Around Windows and Doors
Installing siding around windows and doors requires careful planning and precise cuts. Start by installing the J-channel or trim around the perimeter of the window or door. This will provide a clean, finished edge for the siding to butt against. Measure and cut the siding panels to fit snugly around the window or door, ensuring the proper overlap with adjacent panels. Fasten the siding panels securely to the sheathing, making sure not to damage the window or door frame. Always use the correct fasteners and follow the manufacturer’s instructions for proper spacing and depth. Consider using trim pieces to cover any gaps or inconsistencies for a neat finish. This process demands accuracy to prevent water ingress and maintain the aesthetic integrity of the overall project.
Finishing Touches and Caulking
Source: pinimg.com
You’ve made it this far – the hard work of installing the Hardie siding is almost complete! Now it’s time to focus on the details that will ensure your siding looks great and lasts for years to come. This involves careful caulking, precise trim installation, and meticulous edge finishing. Paying attention to these finishing touches will protect your investment and enhance the overall aesthetic appeal of your home.
Caulking all seams and joints is crucial for preventing water damage. Water intrusion is the enemy of any exterior siding, and neglecting caulking can lead to rot, mold, and costly repairs down the line. Think of caulk as your siding’s waterproof armor, sealing gaps and preventing moisture from seeping into the wall assembly.
Caulking Procedures
Proper caulking requires the right tools and techniques. You’ll need a high-quality exterior-grade caulk (specifically designed for use with fiber cement siding), a caulking gun, and a smoothing tool. Apply the caulk in a continuous bead, pressing it firmly into the joint. Immediately smooth the bead with your finger (wearing a latex glove) or a caulking tool, ensuring a neat, weather-tight seal. Allow the caulk to cure completely before painting. Focus on all seams between siding panels, around windows and doors, and at the base of the siding where it meets the foundation.
Trim and Accessory Installation
Installing trim and accessories adds the finishing touches to your Hardie siding project. This includes things like corner trim, J-channel, window and door trim, and any decorative molding. These pieces not only enhance the visual appeal but also provide additional protection against the elements. Always follow the manufacturer’s instructions for proper installation, ensuring proper alignment and secure fastening. Pre-drilling pilot holes is recommended to prevent cracking of the trim pieces.
Finishing Edges and Corners
Neatly finished edges and corners are essential for a professional-looking job. Use appropriate trim pieces to cover raw edges and create a clean, finished look. Corner trim is specifically designed to provide a smooth transition at outside corners, protecting the siding from damage and maintaining a sharp, crisp appearance. For inside corners, carefully miter the trim pieces to ensure a tight, seamless fit. Remember, proper measurement and precise cuts are key to achieving a professional finish.
Potential Issues and Solutions
Careful planning and execution will minimize issues, but some problems may still arise. Being prepared for these will save time and frustration.
- Problem: Gaps between siding panels. Solution: Ensure proper panel alignment and spacing during installation. If gaps exist, carefully remove the affected panels and reinstall correctly. For small gaps, use appropriate caulking to seal.
- Problem: Caulk not adhering properly. Solution: Ensure the surface is clean and dry before applying caulk. Use a primer if necessary, and select a high-quality, exterior-grade caulk appropriate for fiber cement.
- Problem: Damaged trim pieces. Solution: Carefully inspect all trim pieces before installation. Replace any damaged pieces to maintain a professional appearance.
- Problem: Uneven caulking. Solution: Practice on scrap material first. Use a smoothing tool to create a neat, even bead. If the caulk is already cured, carefully remove the excess with a razor blade and reapply.
Visual Aids and Descriptions
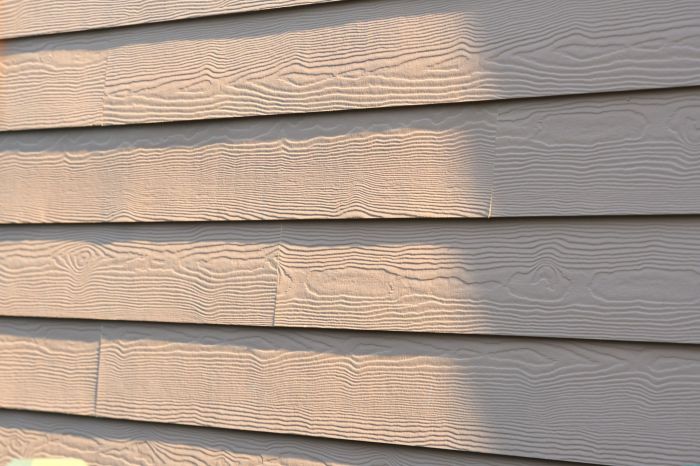
Properly installed Hardie siding presents a uniform and aesthetically pleasing exterior. Understanding what constitutes correct installation is crucial for achieving a long-lasting and attractive finish. Visual inspection plays a key role in assessing the quality of the work.
Correctly installed Hardie siding displays consistent color and texture across all panels. The color should be even, without noticeable variations or streaks. The texture, whether it’s smooth or textured, should be uniform, free from blemishes or inconsistencies. Panel alignment is critical; panels should butt neatly together, forming straight, continuous lines, both horizontally and vertically. There should be no noticeable gaps or overlaps between panels, and the spacing should be consistent throughout the entire installation. The overall appearance should be clean and professional, showcasing the quality of materials and workmanship.
Incorrectly Installed Hardie Siding
Incorrectly installed Hardie siding is easily identifiable through several visual cues. Gaps between panels are a common issue, often appearing as uneven spaces of varying widths. Misalignment is another clear indicator; panels may not be properly aligned, resulting in crooked lines and an untidy appearance. Uneven spacing between panels further contributes to a substandard look. Inconsistent color or texture across the panels suggests issues with material application or quality control. Overlapping panels indicate improper installation techniques, leading to unsightly bumps and ridges. Buckling or warping of panels can be caused by improper fastening or exposure to the elements. These imperfections not only detract from the aesthetic appeal but also compromise the siding’s protective function, potentially leading to water damage and other problems.
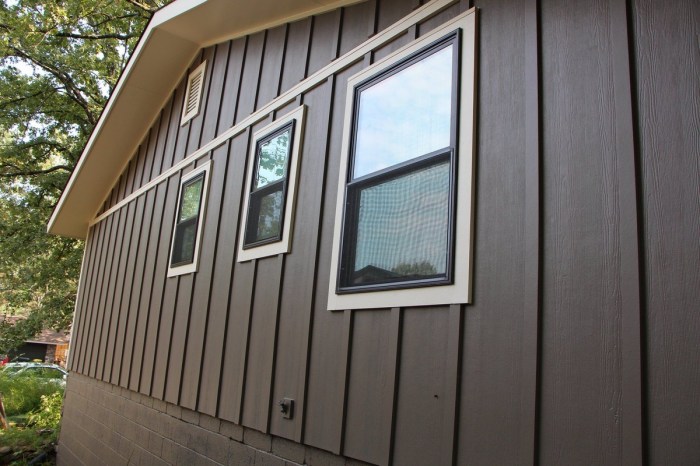
Hardie Siding Profile Variations
Different Hardie siding profiles offer distinct visual characteristics. Lap siding, for example, features overlapping panels that create a classic, traditional look. The staggered overlaps create a shadow line effect, adding depth and dimension to the exterior. The horizontal lines are typically very consistent and straight. Panel siding, in contrast, consists of larger, individual panels that are installed horizontally or vertically. This style often creates a more modern and sleek appearance. The seams between panel siding are typically more pronounced than in lap siding, and the overall look can be bolder. Other profiles, such as shingles, offer a more textured and rustic appearance. The visual differences between these profiles are significant and should be considered when choosing a style for a particular project. Careful consideration of the home’s architectural style and personal preferences is essential for selecting the most appropriate profile.
Final Thoughts

Source: advanceroofingllc.com
Installing Hardie siding is a rewarding experience that significantly enhances your home’s curb appeal and protection. Remember, meticulous planning and attention to detail are key to a successful installation. By following the steps outlined in this guide, and paying close attention to proper measurements, cutting techniques, and fastening methods, you can achieve a professional-looking finish that will stand the test of time. Take your time, double-check your work, and enjoy the process of transforming your home’s exterior!
FAQs: How To Put Up Hardie Siding
Can I install Hardie siding myself, or do I need a professional?
While DIY installation is possible, it requires skill and attention to detail. If you’re uncomfortable with home improvement projects, hiring a professional is recommended.
What’s the best time of year to install Hardie siding?
Spring or fall are generally ideal, avoiding extreme heat or cold that can affect the materials or the adhesive.
How long does Hardie siding typically last?
With proper installation and maintenance, Hardie siding can last 50 years or more.
How do I clean Hardie siding?
Regularly rinse with a garden hose. For tougher stains, use a mild detergent and a soft-bristled brush.
Is Hardie siding fire resistant?
Yes, Hardie siding is highly fire-resistant, offering significant protection compared to other siding materials.