How Much to Install Hardie Plank Siding?
How much to install Hardie Plank siding? That’s a question many homeowners ask, and the answer isn’t a simple number. The cost depends on several factors, from the size and complexity of your home to the type of siding you choose and your location. We’ll break down all the cost components – labor, materials, and preparation – to help you get a realistic estimate and plan your project effectively. This guide will walk you through everything you need to know, from understanding the variables influencing the final price to finding a reliable installer and maintaining your new siding.
We’ll cover everything from understanding the different types of Hardie Plank and their pricing to navigating the complexities of contractor quotes and ensuring you’re getting a fair deal. We’ll also delve into the practical aspects of installation, including preparation, the installation process itself, and long-term maintenance for your investment.
Factors Affecting Hardie Plank Siding Installation Cost
Getting Hardie Plank siding installed can be a significant investment. The final price depends on several interconnected factors, making it crucial to understand these influences before you begin your project. This will allow you to better budget and negotiate with contractors. Let’s break down the key elements affecting the overall cost.
Hardie Plank Siding Cost Breakdown
The total cost of installing Hardie Plank siding is a combination of material costs and labor charges. Several factors significantly impact both aspects. The following table summarizes these key influences.
| Factor | Description | Cost Impact | Example |
|---|---|---|---|
| Labor Rates | Hourly or daily rates charged by installers vary widely based on location, experience, and demand. | High | A highly skilled installer in a major city might charge $50-$80 per hour, while a less experienced installer in a rural area might charge $30-$40 per hour. |
| Material Costs (Siding) | The cost of Hardie Plank siding itself varies depending on the type (e.g., standard plank, lap siding, vertical siding), color, and finish. | High | Premium colors and textured finishes are generally more expensive than standard options. A popular color might cost $2.50-$4.00 per square foot, while a more unique color or finish could be $4.00-$6.00 per square foot. |
| Material Costs (Accessories) | This includes trim, flashing, fasteners, and other necessary components. | Medium | The cost of trim and flashing can add up, especially on complex projects. Expect to pay an additional $1-$3 per square foot for these materials. |
| House Size and Complexity | Larger houses and those with intricate designs require more materials and labor, increasing the overall cost. | High | A simple, single-story ranch will cost significantly less than a large, multi-story home with dormers, gables, and other architectural features. |
| Regional Variations | Labor and material costs fluctuate across different regions due to factors such as local economic conditions and availability of resources. | Medium | Installation costs in a high-cost-of-living area like San Francisco will be higher than in a more affordable area like Omaha, Nebraska. |
| Existing Siding Removal | If you’re replacing existing siding, the cost of removal and disposal will add to the overall expense. | Medium | Removing old wood siding adds time and labor, potentially increasing costs by several hundred to thousands of dollars, depending on the house size and the type of siding being removed. |
| Permits and Inspections | Building permits and inspections are necessary in most areas and add to the project’s total cost. | Low | Permitting fees vary widely by location, typically ranging from a few hundred to a thousand dollars. |
| Waste Removal | Proper disposal of construction waste is crucial and contributes to the overall expense. | Low | Costs can vary depending on the volume of waste and local regulations. |
| Siding Type and Finish | Different Hardie Plank siding types (e.g., lap siding, vertical siding, shingles) and finishes (e.g., smooth, textured) have varying material costs. | Medium | Textured finishes generally cost more than smooth finishes. Specialty siding profiles like vertical planks can also increase material costs. |
Impact of House Size and Complexity
The size and architectural complexity of your home directly impact the installation cost. A larger home naturally requires more siding materials and more labor hours to complete the installation. Intricate designs with numerous angles, dormers, and other features increase both material usage and labor time, driving up the overall price. For example, a simple 1,500 square foot ranch house will have a lower installation cost than a 3,000 square foot two-story home with multiple gables and bay windows.
Cost Differences Between Hardie Plank Siding Types and Finishes
Hardie Plank offers various siding types and finishes, each influencing the final cost. While the core material remains similar, the manufacturing process and the added textures affect pricing. For instance, a smooth finish will typically be less expensive than a textured finish mimicking wood grain. Similarly, different siding profiles, like lap siding versus vertical siding, may have different material costs due to manufacturing complexity. These differences, while sometimes subtle, can accumulate and impact the total project cost.
Labor Costs Associated with Installation
Labor costs are a significant portion of the overall expense when installing Hardie Plank siding. Understanding these costs, and the factors that influence them, is crucial for accurate budgeting. This section will break down labor rates, explore factors affecting those rates, and illustrate a realistic labor cost scenario for a typical project.
The hourly or daily rate a siding installer charges is highly variable. Several factors influence the final cost, including location, experience, and the complexity of the job. While precise figures are difficult to provide without specific details, we can offer a general range to provide a better understanding.
Typical Labor Rates for Siding Installers, How much to install Hardie plank siding
Labor rates for professional siding installers fluctuate based on geographic location and the installer’s experience level. Generally, you can expect to pay more in areas with a higher cost of living and for installers with extensive experience and proven expertise. The following bullet points represent a broad range, and actual rates may vary significantly.
- Lower Cost of Living Areas (e.g., parts of the Midwest, South): Hourly rates might range from $40 to $70, or daily rates from $300 to $550. This assumes a standard work day of 8 hours. Experienced installers may command higher rates at the upper end of this range.
- Higher Cost of Living Areas (e.g., major coastal cities, Northeast): Hourly rates could range from $60 to $100, or daily rates from $480 to $800. Again, this is for a typical 8-hour workday. Specialized skills or extensive experience will further inflate this cost.
- Specialized Installers: Installers with niche skills (e.g., intricate trim work, complex designs) may charge significantly more, possibly exceeding $100 per hour or $800 per day.
Factors Affecting Labor Costs
Several factors can significantly impact the overall labor cost. Understanding these factors will allow for better budgeting and communication with your contractor.
- Project Complexity: Simple, straightforward installations on a standard rectangular house will generally cost less than a project involving multiple angles, intricate trim work, or extensive repairs to existing siding. Complex projects require more time and specialized skills, thus increasing labor costs.
- Accessibility: Difficult-to-access areas (e.g., steep roofs, narrow walkways) increase labor time and can increase the overall cost due to the added challenges and potential safety precautions required.
- Installer Experience: Experienced installers are generally more efficient and may complete the job faster, potentially offsetting higher hourly rates. However, their expertise often justifies a higher cost per hour or day.
- Materials Handling: The amount of materials and the ease of access to them can also affect labor costs. Difficult material handling situations can increase labor costs.
Hypothetical Labor Cost Scenario: Medium-Sized House
Let’s consider a medium-sized, two-story house (approximately 2,000 square feet of siding) with standard Hardie Plank installation in a moderately priced area. We will assume a two-person crew working for three days. This is a simplified example; real-world scenarios may vary greatly.
Assuming an average hourly rate of $65 per installer (a reasonable midpoint for many areas), and a standard 8-hour workday, the calculation would be:
$65/hour/installer * 2 installers * 8 hours/day * 3 days = $3120
Therefore, the estimated labor cost for this hypothetical project would be approximately $3120. Remember, this is just an estimate, and actual costs could be higher or lower depending on the factors discussed above.
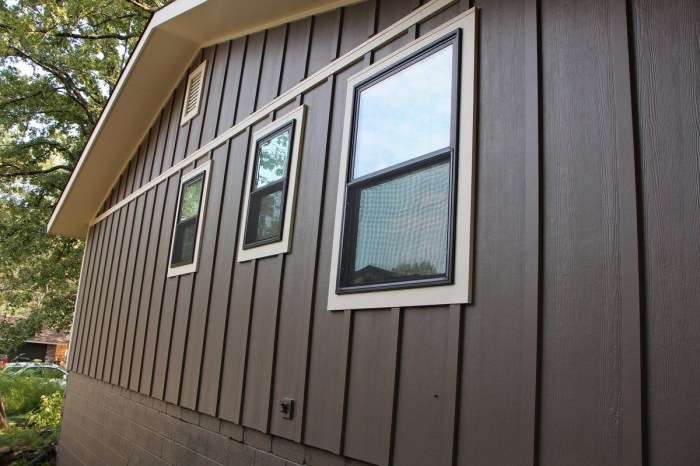
Material Costs for Hardie Plank Siding
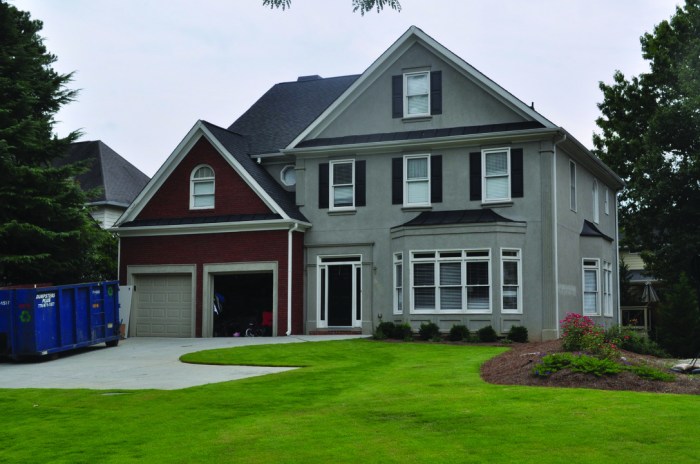
Source: atlantahomeimprovement.com
Getting a handle on the material costs is crucial for accurately budgeting your Hardie Plank siding project. The total cost will depend significantly on factors like the size of your house, the chosen color and texture of the siding, and the amount of trim needed. Let’s break down the costs.
Hardie Plank Siding Cost Per Square Foot
The price of Hardie Plank siding varies depending on several factors. Understanding these variations will help you make informed decisions and create a realistic budget.
- Standard Hardie Plank: Expect to pay between $1.50 and $3.00 per square foot for standard thickness and colors. This is a common price range for widely available options.
- Premium Colors and Textures: More unique colors or textures, such as those mimicking wood grain or stone, will typically cost more, ranging from $3.00 to $5.00 or even higher per square foot. These premium options often add to the overall aesthetic appeal.
- Thickness Variations: Thicker planks generally provide added durability and may offer better insulation, but this increased quality comes with a price increase. You might see a difference of $0.50 to $1.00 per square foot between standard and thicker options.
Additional Materials and Costs
Beyond the siding itself, several other materials are essential for a successful installation. These add to the overall project expense, so it’s vital to include them in your budget.
| Material | Cost per unit/square foot |
|---|---|
| Fasteners (nails, screws) | $0.10 – $0.20 per square foot (depending on fastener type and quantity) |
| Flashing (window, door, etc.) | $1.00 – $3.00 per linear foot |
| Caulk | $10 – $20 per tube (enough for several hundred square feet) |
| Trim boards (corner boards, J-channel, etc.) | $2.00 – $5.00 per linear foot |
| Underlayment (housewrap) | $0.20 – $0.50 per square foot |
Sample Materials List and Cost Estimate for a 1500 sq ft House
Let’s assume a mid-range scenario for a 1500 sq ft house using standard Hardie Plank siding at $2.50 per square foot. We’ll also factor in the average costs for additional materials. Remember, this is just an estimate; actual costs can vary.
| Material | Quantity | Cost per Unit | Total Cost |
|---|---|---|---|
| Hardie Plank Siding | 1500 sq ft | $2.50/sq ft | $3750 |
| Fasteners | 1500 sq ft | $0.15/sq ft | $225 |
| Flashing | 150 linear ft (estimate) | $2.00/linear ft | $300 |
| Caulk | 2 tubes | $15/tube | $30 |
| Trim Boards | 200 linear ft (estimate) | $3.00/linear ft | $600 |
| Underlayment | 1500 sq ft | $0.30/sq ft | $450 |
| Total Material Cost | $5355 |
Preparing for Hardie Plank Siding Installation
Getting your home ready for Hardie Plank siding is crucial for a successful and long-lasting installation. Proper preparation ensures a smooth, even surface for the siding to adhere to, prevents future problems, and ultimately saves you money in the long run. This involves removing existing siding, addressing any underlying issues, and ensuring the surface is primed for the new siding.
Preparing your home for Hardie Plank siding installation involves several key steps, from removing old siding to ensuring a structurally sound surface. This process requires careful attention to detail to achieve a professional finish and maximize the lifespan of your new siding. The right tools will make the job easier and safer.
Surface Preparation and Old Siding Removal
Before installing new Hardie Plank siding, any existing siding must be removed. This includes inspecting the underlying sheathing for damage and making necessary repairs. Depending on the type of old siding, the removal process can vary in difficulty. For example, removing wood siding often involves careful prying and potential nail removal, while vinyl siding might be easier to detach. Thorough cleaning is essential after removal to prepare the surface for the new siding.
The following steps are the process of preparing the house exterior for Hardie Plank siding installation:
- Inspect the existing siding: Carefully examine the current siding for damage, rot, or loose areas. Note any areas needing repair before removal.
- Remove the old siding: Use appropriate tools (pry bars, hammers, etc.) to carefully remove the existing siding. Be cautious not to damage the underlying sheathing.
- Repair damaged sheathing: Replace any damaged or rotten sheathing with new material. Ensure all sheathing is securely fastened.
- Clean the surface: Thoroughly clean the sheathing, removing any debris, loose paint, or other obstructions. A pressure washer can be helpful, but use caution to avoid damaging the wood.
- Address any moisture issues: Inspect for signs of water damage or moisture penetration. Repair any leaks or water damage before installing new siding.
- Prime the surface (optional): Applying a primer can improve the adhesion of the Hardie Plank siding and provide additional protection against moisture.
Necessary Tools and Equipment
Having the right tools significantly impacts the efficiency and quality of the Hardie Plank siding installation. Investing in quality tools will not only speed up the process but also contribute to a more professional finish. Improper tools can lead to damage and delays.
A comprehensive list of necessary tools and equipment includes:
- Measuring tapes and levels: Accurate measurements are critical for precise siding placement.
- Pry bars and hammers: For removing old siding and securing new siding.
- Circular saw or hand saw: For cutting Hardie Plank siding to size.
- Drill and drill bits: For fastening the siding to the sheathing.
- Caulk gun and caulk: For sealing gaps and joints.
- Safety glasses and gloves: Essential for protecting your eyes and hands during the installation process.
- Ladder and scaffolding (if needed): For safe and easy access to higher areas of the house.
- Power washer (optional): For cleaning the exterior surface before installation.
- Nail gun (optional): Can significantly speed up the installation process.
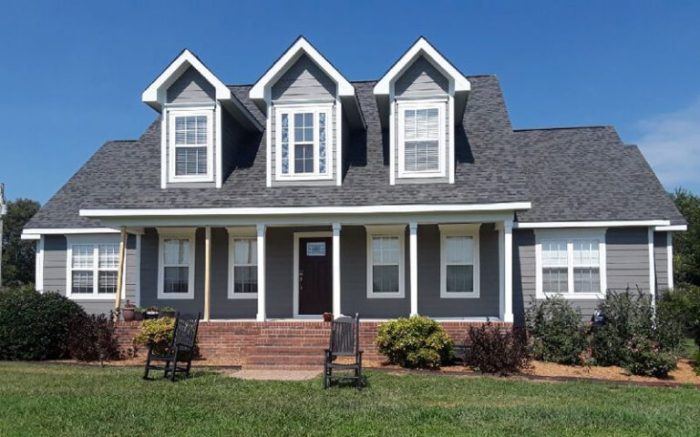
The Installation Process Itself

Source: allstarwindowsiding.com
Installing Hardie Plank siding is a multi-step process requiring precision and attention to detail. Proper installation ensures a long-lasting, attractive, and weather-resistant exterior. This section outlines the key steps, common challenges, and best practices for successful Hardie Plank siding installation.
The process begins with preparing the wall sheathing, ensuring it’s clean, dry, and structurally sound. This involves addressing any imperfections or damage before starting the siding installation. Next, you’ll install starter strips, followed by the first course of siding. Subsequent courses are then installed, overlapping and fastening according to manufacturer’s specifications. Finally, you’ll install trim pieces and accessories to complete the project. Throughout the entire process, adherence to manufacturer’s instructions is paramount for optimal performance and warranty coverage.
Step-by-Step Hardie Plank Siding Installation
This section details the sequential steps involved in installing Hardie Plank siding. Each step plays a vital role in ensuring a successful and long-lasting installation.
- Prepare the wall: Ensure the wall sheathing is clean, dry, and free of any damage. Repair any imperfections and ensure proper structural support.
- Install flashing: Install flashing around windows, doors, and other openings to prevent water penetration. Proper flashing is crucial for water management and building longevity.
- Install starter strip: This provides a level base for the first course of siding and ensures proper alignment. Make sure it’s securely fastened and level.
- Install the first course of siding: Start at a corner or a reference point, aligning the siding according to manufacturer’s specifications. Use appropriate fasteners and spacing.
- Install subsequent courses: Overlap each course according to manufacturer’s recommendations (typically 1 inch). Maintain consistent alignment and spacing.
- Cut and fit around openings: Carefully measure and cut the siding to fit around windows, doors, and other openings. Ensure precise cuts for a clean and professional finish.
- Install trim and accessories: Install corner trim, J-channel, and other necessary accessories to complete the installation and provide a finished look.
- Caulk and seal: Apply caulk to seal gaps and joints to prevent water intrusion. This step is essential for weather protection.
Fastening Techniques and Overlapping Methods
Proper fastening and overlapping are crucial for a durable and weather-resistant installation. Incorrect techniques can lead to damage and void warranties.
Hardie Plank siding should be fastened using galvanized nails or screws designed for fiber cement siding. Fasteners should be driven straight and not over-driven, avoiding damage to the siding. The overlapping method ensures a continuous, watertight barrier. The manufacturer’s recommended overlap should always be followed. Typically, a 1-inch overlap is used, creating a staggered pattern for added strength and water resistance.
Common Installation Challenges and Solutions
Several challenges can arise during Hardie Plank siding installation. Understanding these challenges and their solutions can help ensure a smooth and successful project.
- Uneven wall surfaces: Use shims to level the siding and ensure proper alignment. This will prevent gaps and ensure a professional look.
- Difficult cuts around openings: Use a sharp utility knife or circular saw with a fine-tooth blade for precise cuts. Take your time and double-check measurements to avoid errors.
- Fastener problems: Use the correct type and size of fasteners and avoid over-driving them. Over-driven fasteners can damage the siding and compromise its structural integrity.
- Water penetration: Ensure proper flashing around windows and doors and use caulk to seal all gaps and joints. This will prevent water damage and ensure long-term durability.
Visual Representation of Properly Installed Hardie Plank Siding
Imagine a section of wall clad in Hardie Plank siding. The starter strip is installed level at the bottom, providing a straight, even base. The first course of siding is neatly aligned, with the bottom edge flush with the starter strip. Subsequent courses overlap the previous course by approximately one inch, creating a staggered pattern. Galvanized nails are driven straight and evenly spaced, avoiding over-driving. Around a window, a piece of flashing is visible, tucked neatly under the siding and extending beyond the window frame. The siding is cleanly cut and fitted around the window, with no gaps or irregularities. Caulk is neatly applied to all joints and seams, ensuring a watertight seal. The overall appearance is clean, straight, and professional.
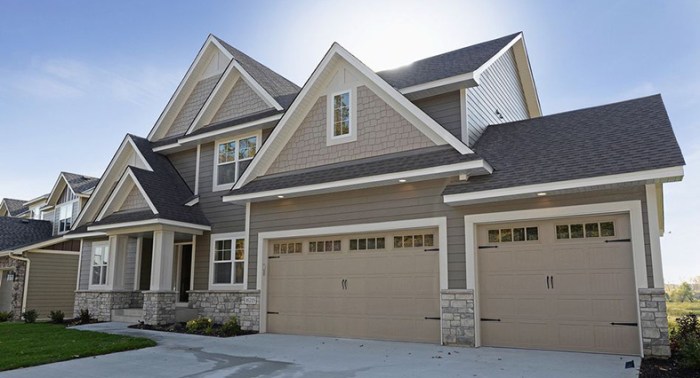
Obtaining Quotes and Choosing an Installer

Source: kentcladding.com
Getting the best price for your Hardie Plank siding installation involves more than just comparing numbers. You need to ensure you’re comparing apples to apples, and that the chosen installer is qualified and trustworthy. This section will guide you through the process of obtaining and evaluating quotes to make an informed decision.
Getting multiple quotes is crucial for comparing prices and services. Don’t settle for just one; aim for at least three to five quotes from different contractors. This allows you to compare not only the cost but also the scope of work, materials used, and the contractor’s overall approach. Remember, the cheapest quote isn’t always the best value.
Contractor Licensing and Insurance Verification
Before you even consider a quote, verify that the contractor is properly licensed and insured. This is essential for your protection. Unlicensed contractors may not adhere to building codes or offer adequate warranties, while uninsured contractors leave you liable for any accidents or damages that occur during the installation. Check your state’s licensing board website to verify licenses and confirm that the insurance coverage is up-to-date and sufficient. Request proof of insurance and verify the policy directly with the insurance provider if you have any doubts.
Contract Types and Payment Schedules
Different contractors may offer different contract types and payment schedules. Understanding these is key to protecting yourself financially. Common contract types include fixed-price contracts (where the total cost is agreed upon upfront), and time-and-materials contracts (where you pay for labor and materials as they are used). Fixed-price contracts offer more certainty regarding the final cost, while time-and-materials contracts offer flexibility but can lead to unexpected expenses if the project takes longer than anticipated.
Payment schedules usually involve a down payment upfront (typically 10-25%), progress payments during the installation, and a final payment upon project completion. Never pay the full amount upfront. A well-structured contract will define the payment schedule and tie payments to specific milestones in the project. For example, a payment might be released upon completion of the underlayment or after a successful inspection. Review the contract carefully and ensure you understand all terms and conditions before signing. A reputable contractor will be transparent and willing to answer your questions.
Questions to Ask Potential Installers
Before committing to a contractor, it’s vital to ask specific questions to ensure a smooth and successful installation. This will help you compare quotes accurately and choose the best fit for your needs.
- What is the total cost breakdown (labor, materials, permits, etc.)?
- What type of Hardie Plank siding do you recommend and why?
- What is your warranty on both materials and workmanship?
- What is your timeline for completion?
- Can you provide references from previous clients?
- What is your process for handling unforeseen issues or changes during installation?
- Are you properly licensed and insured?
- What is your payment schedule?
Remember, choosing the right installer is a significant decision. Thorough preparation and careful consideration of these factors will help ensure a successful and stress-free Hardie Plank siding installation.
Maintaining Hardie Plank Siding
Proper maintenance is key to extending the life and beauty of your Hardie Plank siding. Neglecting this can lead to premature deterioration and costly repairs down the line. By following a simple maintenance schedule, you can protect your investment and enjoy your siding’s aesthetic appeal for years to come.
Regular cleaning and occasional inspections are vital to keeping your Hardie Plank siding looking its best and functioning properly. This proactive approach will prevent minor issues from escalating into major, expensive problems.
Cleaning Hardie Plank Siding
Regular cleaning removes dirt, grime, and mildew, preventing damage and preserving the siding’s appearance. A simple solution of mild detergent and water, applied with a soft-bristled brush, is usually sufficient for most cleaning tasks. For stubborn stains or mildew, a pressure washer can be effective, but use caution to avoid damaging the siding. Always follow the manufacturer’s recommendations for cleaning and avoid harsh chemicals that could damage the finish. For large areas or persistent issues, consider hiring a professional cleaning service.
Inspecting for Damage
Periodic inspections allow for the early detection and repair of any damage, preventing more extensive and costly repairs later. Look for cracks, loose or damaged boards, signs of insect infestation, and any other irregularities. Address these issues promptly to prevent further deterioration. Pay close attention to areas prone to moisture damage, such as around windows and doors. Consider scheduling an annual inspection, or more frequently if your home is in a particularly harsh climate.
Addressing Common Maintenance Issues
Several common problems can affect Hardie Plank siding, but early detection and proper repair can minimize long-term damage. Cracked or damaged boards should be replaced promptly. Loose boards can be re-nailed or rescrewed. Mildew can be removed with a mild bleach solution, but persistent mildew may require professional treatment. Insect infestation needs immediate attention, possibly requiring the use of insecticide or professional pest control services. Caulk around windows and doors should be regularly inspected and replaced if necessary to prevent water penetration.
Long-Term Cost Savings
Investing time and effort in maintaining your Hardie Plank siding yields significant long-term cost savings. Regular cleaning prevents the build-up of dirt and mildew, which can lead to premature deterioration and the need for costly repairs or even premature replacement. Early detection and repair of minor damage prevents small problems from becoming large, expensive issues. By proactively addressing maintenance, you can extend the lifespan of your siding significantly, saving thousands of dollars over the years compared to neglecting maintenance and facing major repairs or premature replacement. For example, replacing a single damaged board is far less expensive than replacing an entire section of siding due to neglected maintenance. A well-maintained Hardie Plank siding can easily last for decades, providing a significant return on investment.
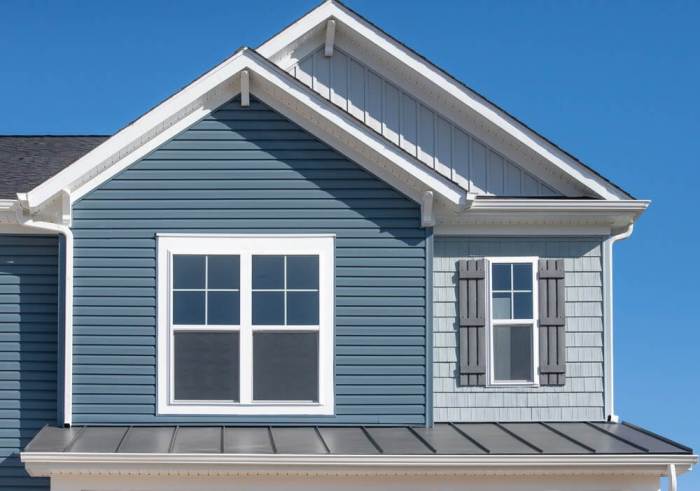
Concluding Remarks

Source: cloudinary.com
So, how much will Hardie Plank siding installation cost you? While a precise figure depends on your specific circumstances, this guide has equipped you with the knowledge to confidently navigate the process. By understanding the factors affecting cost, from labor rates and material prices to project complexity and regional variations, you can obtain accurate quotes, make informed decisions, and ultimately, enjoy the beauty and durability of your new Hardie Plank siding for years to come. Remember to always get multiple quotes and thoroughly vet potential installers to ensure a smooth and successful project.
FAQ Resource: How Much To Install Hardie Plank Siding
What is the lifespan of Hardie Plank siding?
With proper maintenance, Hardie Plank siding can last 30-50 years or even longer.
Can I install Hardie Plank siding myself?
While possible, it’s generally recommended to hire professionals. The installation is complex, and mistakes can be costly to fix.
Does Hardie Plank siding require regular painting?
No, Hardie Plank siding is designed to be low-maintenance and doesn’t typically require repainting for many years. However, periodic cleaning is recommended.
What kind of warranty does Hardie Plank siding have?
Check with the manufacturer for specific warranty details, as they vary by product and region.
Are there financing options available for Hardie Plank siding installation?
Some contractors may offer financing options or you can explore home improvement loans through banks or credit unions.