How Much to Put Hardie Siding on a House?
How much to put Hardie siding on a house? That’s a question many homeowners ask, and the answer isn’t a simple number. The cost of installing Hardie siding depends on several factors, from the size and complexity of your home to the type of siding you choose and even your location. This guide breaks down everything you need to know to get an accurate estimate, helping you budget effectively for this significant home improvement project. We’ll explore material costs, labor fees, regional differences, and even ways to save money without sacrificing quality.
Think of it like building with LEGOs – a small, simple house requires fewer bricks (materials) and less time to assemble (labor), while a large, intricate castle needs significantly more. Similarly, a smaller, simpler home will cost less to build than a large, multi-gabled mansion. We’ll delve into these details, helping you understand the price breakdown and choose the best option for your needs.
Factors Influencing Hardie Siding Cost

Getting Hardie siding installed on your house can be a significant investment. The final cost depends on several interconnected factors, and understanding these will help you budget effectively and avoid surprises. This section breaks down the key cost drivers to give you a clearer picture.
Material Costs
The type of Hardie siding you choose significantly impacts the overall cost. Hardie offers various styles and finishes, each with a different price point. Higher-end options, such as those with more intricate designs or premium finishes, will naturally cost more. Furthermore, the amount of siding needed will depend on your home’s square footage and the complexity of its design. More intricate designs, such as those with many angles or dormers, will require more material and thus increase the cost.
Labor Costs
Labor costs are a substantial portion of the overall project expense. The complexity of your home’s design and the level of experience of the installation crew directly influence labor costs. A more experienced and skilled crew may charge a higher hourly rate, but their expertise often leads to a more efficient and higher-quality installation, potentially offsetting the higher labor cost in the long run. The amount of time needed for prep work, such as removing old siding, also impacts labor costs. Finally, regional differences in labor rates also play a role.
Regional Variations
Pricing for Hardie siding and installation varies geographically. Areas with higher costs of living typically have higher labor and material costs. Supply chain issues and local market conditions can also influence prices. For example, a coastal region prone to hurricanes might have higher demand for durable siding like Hardie, potentially pushing up prices. Conversely, areas with less demand might offer more competitive pricing.
| Factor | Impact on Cost | Example | Mitigation Strategy |
|---|---|---|---|
| Material Type | Significant; premium options cost more. | Lap siding is generally less expensive than shingles or panels. | Choose a siding type that balances cost and desired aesthetics. |
| Labor Rates | Substantial; varies by region and contractor experience. | Experienced crews may charge more hourly but work faster. | Obtain multiple quotes from different contractors. |
| House Size & Complexity | Directly proportional; larger, more complex homes cost more. | A two-story home with many dormers will be more expensive than a single-story ranch. | Consider simplifying the design if budget is a major concern. |
| Regional Differences | Significant; cost of living and market conditions affect pricing. | Coastal areas may have higher prices due to demand. | Shop around and compare quotes from contractors in different areas (if feasible). |
Hardie Siding Types and Cost Implications
The cost of Hardie siding varies depending on the type you select. Choosing the right type involves balancing your budget with your aesthetic preferences and the specific needs of your home.
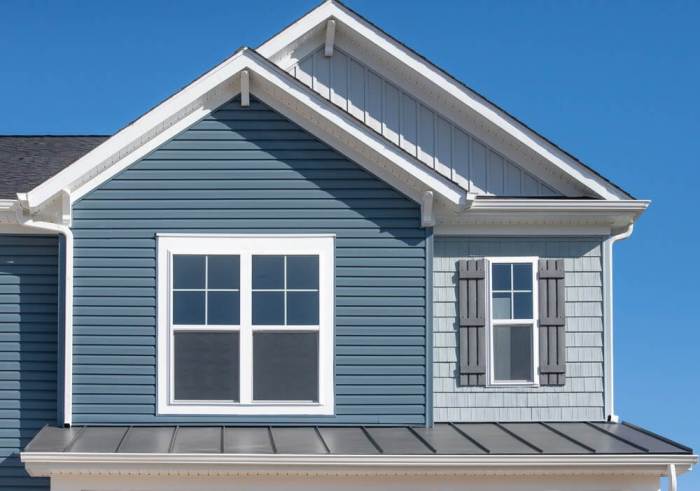
Different Hardie siding types include:
- Lap Siding: Generally the most economical option, offering a classic look.
- Shingles: More expensive than lap siding, providing a textured, dimensional appearance.
- Panels: Can range in price depending on size and design; often used for larger areas for a clean, modern look.
- Vertical Siding: Offers a modern look and can vary in price depending on the specific design and profile.
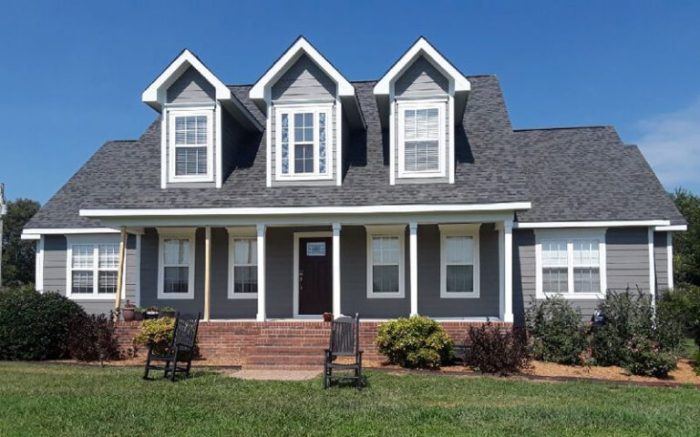
House Size and Complexity Impact on Cost
The size and complexity of your home directly affect the total project cost. Larger homes require more materials and labor, resulting in higher overall expenses. Similarly, homes with intricate designs, such as multiple gables, dormers, or complex trim details, increase both material and labor costs.
| House Size | Approximate Cost Range (USD) | Notes |
|---|---|---|
| Small (under 1500 sq ft) | $8,000 – $15,000 | This range assumes a relatively simple design. |
| Medium (1500 – 2500 sq ft) | $15,000 – $30,000 | More complex designs fall towards the higher end of this range. |
| Large (over 2500 sq ft) | $30,000+ | Costs can significantly increase with larger, more complex homes. |
Material Costs

Getting a handle on the material costs for your Hardie siding project is crucial for accurate budgeting. Remember, these prices are estimates and can vary based on location, supplier, and the current market. Always get multiple quotes from reputable contractors to ensure you’re getting the best price.
The cost of Hardie siding and accessories is a significant portion of your overall project expense. Understanding the pricing structure for different materials and options will help you make informed decisions that balance your budget with your desired aesthetic and durability.
Hardie Siding Material Costs
The following table provides estimated pricing for various Hardie siding options. These prices are per square (100 square feet) and are subject to change. Factors like color, texture, and plank size will influence the final cost. Always check with your local supplier for the most up-to-date pricing in your area.
| Hardie Siding Type & Description | Price per Square (USD) | Notes |
|---|---|---|
| HardiePlank Lap Siding (Standard Colors) | $150 – $250 | Prices vary based on color and region. |
| HardiePlank Lap Siding (Premium Colors) | $200 – $350 | Premium colors often include more complex finishes. |
| HardieShingle Siding (Standard Colors) | $175 – $300 | Shingle siding tends to be slightly more expensive due to its unique profile. |
| HardiePanel Vertical Siding (Standard Colors) | $180 – $280 | Vertical siding offers a modern aesthetic. |
| HardieTrim Boards | $100 – $200 | Prices depend on size and profile. |
| Large Format HardiePlank | $250 – $400+ | Larger planks can reduce installation time, but cost more per square. |
Hardie Siding Accessories Costs
Beyond the siding itself, several accessories are necessary for a complete and professional installation. These add to the overall cost, but are essential for proper performance and longevity of the siding.
- Trim Boards: $100 – $200 per square, depending on style and size. These are used to finish edges and corners.
- Flashing: $50 – $150 per linear foot, depending on material (aluminum, galvanized steel). Flashing protects vulnerable areas like windows and doors from water damage.
- Fasteners: $25 – $75 per box (typically 500-1000 fasteners). Choosing stainless steel fasteners increases cost but significantly enhances longevity.
- Caulk and Sealant: $20 – $50 per tube. High-quality caulk ensures a weathertight seal around windows, doors, and other penetrations.
- Starter Strips and J-Channel: $50 – $100 per linear foot. These provide a clean and consistent start and finish for the siding installation.
Material Choice Impact on Cost and Longevity
The materials you choose significantly impact both the initial cost and the long-term lifespan of your Hardie siding. Opting for premium colors or larger format planks will increase the upfront cost but can offer a more aesthetically pleasing result. Similarly, choosing stainless steel fasteners instead of galvanized steel adds to the initial cost, but greatly extends the life of the siding by preventing corrosion.
Investing in higher-quality accessories like flashing and caulk can prevent costly repairs down the line due to water damage. While the initial investment may seem higher, the long-term savings from reduced maintenance and repairs often outweigh the extra upfront expense. Consider this a strategic investment in the lasting value of your home.
Labor Costs & Contractor Selection
Labor costs for Hardie siding installation are a significant portion of the overall project expense. These costs vary widely depending on several key factors, making it crucial to understand what influences the final price before you begin. This section will explore these factors and guide you through selecting the right contractor for your project.
The range of labor costs for Hardie siding installation typically falls between $3 and $8 per square foot. This broad range reflects the influence of geographical location, the contractor’s experience and reputation, and the complexity of the project itself. Higher labor rates are common in areas with a high cost of living or a limited supply of skilled labor. Experienced and highly-rated contractors will generally charge more than those with less experience. Projects involving intricate detailing, extensive trim work, or difficult-to-access areas will also command higher labor costs. For example, a simple, one-story home with minimal trim might fall closer to the lower end of the range, while a multi-story home with complex architectural features could reach the higher end.
General Contractor vs. Specialized Siding Contractor
Choosing between a general contractor and a specialized siding contractor involves weighing several advantages and disadvantages. Both can complete your project, but each approach has its own set of considerations.
- General Contractor:
- Pros: Manages all aspects of the project, from permitting to cleanup. Can be a single point of contact for all subcontractors.
- Cons: May subcontract the siding work to a less experienced crew, potentially leading to quality issues. Can be more expensive due to overhead costs.
- Specialized Siding Contractor:
- Pros: Expertise in Hardie siding installation, often leading to higher quality work and faster completion times. May offer more competitive pricing due to specialization.
- Cons: You will need to coordinate other aspects of the project yourself, such as permitting and other trades.
Contractor Selection Checklist
Selecting a qualified and reputable contractor is vital to ensure a successful project. This checklist will help you evaluate potential contractors and make an informed decision.
- Licensing and Insurance: Verify that the contractor holds the necessary licenses and carries adequate liability and workers’ compensation insurance.
- Experience and References: Request a portfolio of past projects and contact previous clients for references. Look for experience with Hardie siding specifically.
- Detailed Estimate: Obtain a detailed written estimate that outlines all costs, including materials, labor, and any additional fees. Be wary of estimates that seem unusually low.
- Contractual Agreement: Review the contract carefully before signing, ensuring that all aspects of the project, payment terms, and timelines are clearly defined.
- Communication and Professionalism: Choose a contractor who is responsive, communicative, and professional throughout the entire process.
- Warranty: Inquire about the warranty offered on both materials and labor. A reputable contractor will stand behind their work.
Project Timeline & Scheduling: How Much To Put Hardie Siding On A House
Getting Hardie siding installed on your house is a significant project, and understanding the timeline is crucial for planning and budgeting. The overall timeframe depends heavily on several factors, primarily the size of your house and the prevailing weather conditions. Smaller houses with straightforward designs will naturally take less time than larger, more complex homes. Unforeseen weather delays, such as extended periods of rain or extreme heat, can also significantly impact the schedule.
The installation process itself is a multi-step procedure requiring careful coordination and skilled labor. Accurate scheduling relies on a clear understanding of each phase and the potential for unforeseen complications. Proper planning can help minimize delays and ensure the project stays on track.
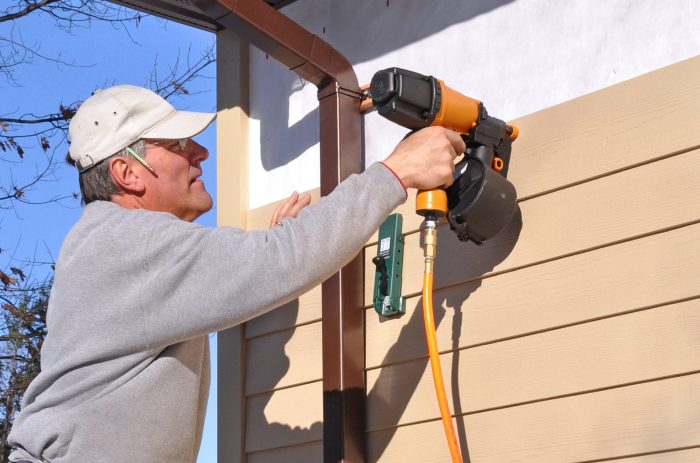
Hardie Siding Installation Steps, How much to put hardie siding on a house
The installation of Hardie siding is a methodical process. Each step is essential for a quality, long-lasting result. A typical installation would follow these steps:
- Preparation: This initial phase involves thorough site preparation. Existing siding removal, if necessary, is included here, along with cleaning the exterior walls and ensuring proper surface preparation for the new siding. This stage may also include addressing any underlying issues, such as rotted wood or damaged sheathing.
- Framing and Sheathing (if necessary): Depending on the condition of your home’s existing structure, additional framing or sheathing might be required. This step ensures a solid and level surface for the Hardie siding installation.
- Installation of Flashing and Water Barriers: Proper flashing and water barriers are critical to preventing water damage. These are installed before the siding to create a protective layer against moisture.
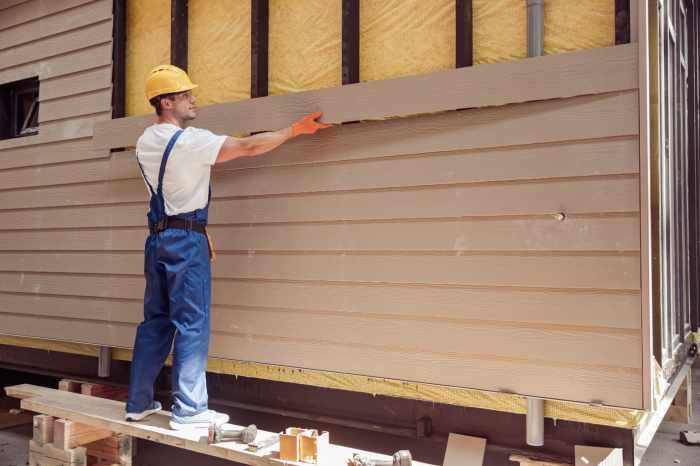
- Siding Installation: This is the core of the project, where the Hardie siding panels are installed, ensuring proper alignment, overlap, and fastening. This often involves cutting panels to fit around windows, doors, and other features.
- Caulking and Finishing: After the siding is in place, caulking is applied to seal gaps and ensure a watertight seal. This final step creates a clean and professional finish.
- Cleanup: The final stage involves removing debris and restoring the property to its pre-project condition.
Realistic Project Timeline Estimates
Let’s consider some examples to illustrate the potential timeline. A small, single-story house (around 1,500 square feet) with relatively simple architecture could take a crew of two experienced installers approximately 2-3 weeks, assuming favorable weather conditions. A larger, two-story home (around 3,000 square feet) with intricate details and multiple architectural features might require 4-6 weeks or even longer. These are estimates, and actual timeframes can vary.
Potential Delays and Mitigation Strategies
Unexpected delays are a possibility in any construction project. Here are some common causes and ways to mitigate them:
- Weather: Rain, snow, or extreme heat can halt work. Mitigation: Choose a contractor with flexible scheduling and contingency plans for weather delays.
- Material Delays: Supply chain issues can sometimes delay material delivery. Mitigation: Work with a contractor who has established relationships with suppliers and can proactively address potential delays.
- Unforeseen Repairs: Discovering underlying structural issues during the process can add time. Mitigation: A thorough inspection before the project starts can help identify and address these issues upfront.
- Unexpected Issues: Finding problems like asbestos or lead paint can cause significant delays. Mitigation: Professional inspections are essential to identify such issues early on.
Permits and Inspections
Getting the necessary permits and inspections for your Hardie siding installation is crucial for a smooth and legal project. Ignoring these steps can lead to hefty fines, project delays, and even legal issues. This section discusses the process and highlights the importance of compliance.
The permitting process typically involves applying to your local building department. This application usually requires detailed plans showing the scope of the project, including materials, dimensions, and any changes to the existing structure. You’ll also need to provide proof of insurance and possibly a contractor’s license. Fees vary depending on your location and the complexity of the project; expect to pay several hundred dollars at minimum. It’s advisable to contact your local building department early in the planning phase to obtain a complete list of requirements and fees specific to your area.
Permit Application Requirements
The specific documents required for a permit application can vary by location, but generally include:
- Completed application form.
- Detailed project plans, including elevations and material specifications.
- Contractor’s license (if applicable).
- Proof of liability insurance and workers’ compensation insurance.
- Property ownership documentation.
- Site survey or plot plan.
Importance of Building Inspections
Building inspections are conducted at various stages of the Hardie siding installation to ensure compliance with building codes and safety regulations. These inspections verify that the work is being done correctly and up to standard, preventing potential problems down the line. Common inspection points include the preparation of the substrate, installation of the siding itself, and final walkthrough once the project is complete. Failing an inspection can result in stop-work orders until the issues are addressed, adding significant time and cost to your project.
Consequences of Neglecting Permits and Inspections
Neglecting to obtain the necessary permits and undergo inspections can result in several serious consequences. These include:
- Fines: Significant fines can be levied for unpermitted work, often exceeding the cost of obtaining the permit in the first place.
- Stop-work orders: Work can be halted until permits are obtained and inspections are passed.
- Legal issues: In some cases, legal action can be taken against the homeowner and/or the contractor.
- Insurance complications: Insurance claims may be denied if the work was not permitted and inspected.
- Resale value issues: Unpermitted work can significantly impact the resale value of your home.
For example, a homeowner in a suburb of Denver, Colorado, was fined $5,000 for unpermitted siding installation, in addition to having to bring the project into compliance with local building codes, costing an extra $3,000. This demonstrates the substantial financial repercussions that can arise from ignoring building regulations.
Maintenance and Lifespan of Hardie Siding
Hardie siding, known for its durability and longevity, still requires proper maintenance to maximize its lifespan and retain its attractive appearance. Regular upkeep will prevent costly repairs down the line and ensure your home’s exterior remains a source of pride for years to come. Understanding the maintenance requirements and potential repair costs will help you budget effectively and plan for the long-term upkeep of your Hardie siding investment.
Proper Maintenance of Hardie Siding
Regular cleaning and occasional repairs are key to keeping your Hardie siding looking its best and extending its lifespan. Neglecting maintenance can lead to premature deterioration and costly repairs. The following routine tasks will help protect your investment.
- Annual Cleaning: Wash your Hardie siding at least once a year using a garden hose with a pressure nozzle set to a low pressure. Avoid using high-pressure washers, as these can damage the siding. For stubborn dirt or mildew, use a mild detergent solution and a soft-bristled brush. Rinse thoroughly afterward.
- Inspect for Damage: During the cleaning process, carefully inspect the siding for any signs of damage, such as cracks, dents, or loose panels. Address any issues promptly to prevent further damage.
- Caulk Repair: Regularly check caulking around windows and doors. Replace any cracked or missing caulking to prevent water intrusion.
- Mildew and Algae Removal: In humid climates, mildew and algae can grow on Hardie siding. Use a commercially available mildew and algae remover, following the manufacturer’s instructions carefully. Always test the cleaner in an inconspicuous area first.
- Paint Maintenance (if applicable): If your Hardie siding is painted, inspect it regularly for peeling or chipping paint. Repaint as needed to maintain protection and aesthetics. Use a high-quality exterior paint designed for fiber cement siding.
Lifespan of Hardie Siding
The lifespan of Hardie siding is significantly influenced by several factors, including climate, maintenance, and the quality of installation. Under ideal conditions (moderate climate, regular maintenance, and proper installation), Hardie siding can last 50 years or more. However, harsh weather conditions (extreme temperatures, heavy rainfall, frequent freeze-thaw cycles) can shorten its lifespan. Poor installation or lack of maintenance can also significantly reduce its longevity. For example, a home in a coastal area with constant salt spray might see a shorter lifespan than a similar home in a dry, inland climate.
Repair and Replacement Costs
Repair costs for Hardie siding vary depending on the extent of the damage. Minor repairs, such as replacing a damaged panel or repairing caulking, can be relatively inexpensive. However, major repairs, such as replacing large sections of siding or addressing water damage, can be significantly more costly. Replacement of the entire siding system would be the most expensive option, potentially costing thousands of dollars depending on the size of the house and labor rates in your area. For example, replacing a single damaged panel might cost between $50 and $200, while replacing a large section of siding could cost several hundred to thousands of dollars. It’s crucial to address damage promptly to prevent more extensive and costly repairs later.
Cost-Saving Strategies

Saving money on Hardie siding installation doesn’t mean sacrificing quality. By making smart choices during the planning and execution phases, you can significantly reduce your overall costs without compromising the durability and aesthetic appeal of your new siding. This involves careful consideration of material choices, labor strategies, and project scope.
Smart choices can lead to significant savings. Let’s explore some key strategies to help you achieve the best possible price without cutting corners on quality.
DIY versus Professional Installation
The decision to DIY or hire a professional significantly impacts the final cost. DIY installation offers the potential for substantial savings on labor costs, but it requires significant time, skill, and the right tools. Improper installation can lead to costly repairs down the line, negating any initial savings. Professional installers possess the expertise and experience to ensure a high-quality, long-lasting installation, minimizing the risk of future problems. Weigh the cost of labor against the potential risks and your skill level. For a large or complex project, the expertise of a professional is generally recommended. For smaller projects with simple designs, a homeowner with some construction experience might consider a DIY approach, but always prioritize safety and proper technique.
Cost Comparison: Over Existing Siding versus New Construction
Installing Hardie siding over existing siding is generally less expensive than starting from scratch with new construction. This is because it avoids the cost of removing the old siding and potentially underlying sheathing. However, this method only works if the existing siding is in good condition and provides a suitable surface for the new Hardie siding. If the underlying structure needs repair, the cost savings might be negated. New construction allows for a more thorough approach, ensuring proper insulation and vapor barriers, which can lead to long-term energy savings. The added cost, however, is considerable. The best approach depends on the condition of the existing siding and the overall goals of the project. For example, a homeowner with sound existing siding might opt for the less expensive overlay method. A homeowner planning extensive home renovations, however, might choose new construction for a more comprehensive solution.
Material Cost Reduction Strategies
Careful material selection can lead to cost savings. Opting for standard colors and avoiding custom colors or finishes can reduce material costs significantly. Also, purchasing materials in bulk can often lead to discounts from suppliers. It’s advisable to obtain multiple quotes from different suppliers to compare prices and identify potential savings. Furthermore, consider the size and type of Hardie plank you need. Larger planks may require less labor to install, offsetting some material cost increases. Careful planning and comparison shopping are key to finding the best balance between cost and quality.
End of Discussion
So, how much will Hardie siding cost you? While there’s no one-size-fits-all answer, by carefully considering the factors Artikeld above – material selection, labor costs, house size, and regional pricing – you can get a realistic estimate. Remember to get multiple quotes from reputable contractors, compare their offerings, and factor in potential cost-saving strategies. With a bit of planning and research, you can transform your home’s exterior with beautiful, durable Hardie siding, all while staying within your budget.
FAQ Section
What is the lifespan of Hardie siding?
Hardie siding is known for its durability and can last 30-50 years or more with proper maintenance.
Can I install Hardie siding myself?
While DIY is possible, it’s generally recommended to hire professionals for a quality installation that’s covered by warranty. The learning curve is steep and mistakes can be costly.
What are the common maintenance needs for Hardie siding?
Regular cleaning with a pressure washer and occasional spot repairs are typically sufficient. Avoid harsh chemicals.
Does Hardie siding require specific permits?
Yes, most areas require permits for exterior renovations. Check with your local building department.
How long does the installation process usually take?
The timeline varies greatly depending on house size and complexity but can range from a few days to several weeks.