How to Install James Hardie Siding
How to install James Hardie siding? It might sound daunting, but with the right planning and techniques, you can achieve a beautiful and durable exterior for your home. This guide walks you through each step, from initial planning and material selection to the final caulking and finishing touches. We’ll cover everything from preparing your home’s exterior to installing the siding panels themselves, ensuring you have the knowledge and confidence to tackle this project. We’ll also address common problems and offer maintenance tips to keep your siding looking its best for years to come.
This comprehensive guide breaks down the James Hardie siding installation process into manageable steps, providing clear instructions and helpful visuals (where applicable). We’ll explore the various tools and materials you’ll need, different installation methods, and crucial details like proper ventilation and caulking techniques. Whether you’re a seasoned DIYer or a first-timer, this guide will equip you with the information you need to succeed.
Planning and Preparation
Installing James Hardie siding is a significant undertaking, requiring careful planning and preparation to ensure a smooth and successful project. Proper preparation will save you time, money, and frustration in the long run. This section details the necessary steps to get your project off to a great start.
Necessary Tools and Materials
Gathering the right tools and materials beforehand is crucial for efficient installation. Having everything readily available will prevent delays and interruptions. You’ll need a variety of tools, from basic hand tools to specialized power equipment. A comprehensive list should include, but isn’t limited to: measuring tape, level, chalk line, circular saw, miter saw, nail gun (with appropriate nails), safety glasses, work gloves, ladder, scaffolding (if needed), utility knife, caulk gun, and various fasteners. Materials will include the James Hardie siding itself (ensure you order enough, accounting for waste), flashing, trim pieces, house wrap (if necessary), and appropriate sealant or caulk.
Measuring and Calculating Siding Requirements
Accurate measurement is paramount to avoid material shortages or excessive waste. Begin by carefully measuring the perimeter of your house, noting any windows, doors, or other features that will require cutouts. Next, measure the height of each wall section. Remember to account for overlaps between siding panels. James Hardie provides helpful guides and calculators on their website to assist with accurate estimations. For example, a typical house might require calculations for different wall sections, considering variations in height and features like dormers or bay windows. Always add an extra 10-15% to your total to account for cuts, mistakes, and potential damage.
Preparing the House Exterior
Before installing the siding, thorough preparation of the house exterior is essential. This involves a comprehensive cleaning to remove dirt, debris, loose paint, and any other obstructions. Power washing is often the most effective method for this. Any damaged or rotten wood should be repaired or replaced. Ensure all surfaces are clean, dry, and level before starting installation. If installing over existing siding, remove it completely unless it’s in excellent condition and compatible with the new James Hardie product. Check for any underlying issues like water damage or insect infestation and address them before proceeding.
Pre-Installation Checklist
Before you begin installation, a thorough checklist will ensure everything is in place. This checklist should confirm that: all necessary permits are obtained; all materials are on-site and accounted for; the house exterior is clean and prepared; appropriate safety equipment is available and will be used; weather conditions are favorable (avoid rain or extreme temperatures); all tools are functioning correctly; and you have a clear understanding of the installation instructions. Reviewing this checklist minimizes the chances of encountering unexpected problems during the installation.
Sample Installation Schedule
A realistic schedule helps manage the project effectively. This is a sample schedule, and the actual timeline will depend on the size of your house and the number of installers.
| Day | Activity |
|---|---|
| Day 1 | Final measurements, material check, and site preparation. |
| Day 2-3 | Installation of starter strips and flashing. |
| Day 4-7 | Siding installation on main walls. |
| Day 8-9 | Installation of trim and finishing touches. |
| Day 10 | Final inspection and cleanup. |
Remember that this is just a sample schedule; adjust it based on your specific needs and project complexity.
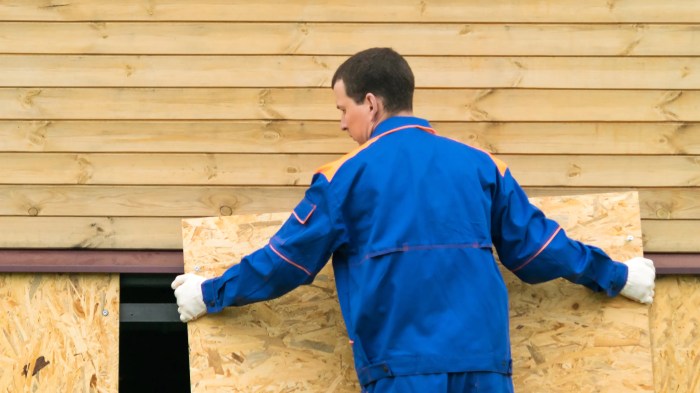
Installing the Sheathing and Underlayment

Source: legacyusa.com
Getting the sheathing and underlayment right is crucial for a long-lasting, beautiful James Hardie siding installation. This layer acts as a protective barrier and provides a solid base for your siding. Proper installation ensures your siding performs as expected and prevents costly problems down the road.
Sheathing Types for James Hardie Siding
Several sheathing options are suitable for James Hardie siding. The choice depends on factors like your climate, budget, and the specific requirements of your project. Common choices include oriented strand board (OSB), plywood, and engineered wood panels. OSB is a cost-effective option, while plywood offers superior strength and dimensional stability. Engineered wood panels provide a balance between cost and performance. Always check the manufacturer’s recommendations for specific sheathing requirements to ensure compatibility with your chosen James Hardie siding product. Remember to use sheathing that’s properly graded and free from defects.
Housewrap or Building Paper Installation
After installing the sheathing, it’s time to apply housewrap or building paper. This acts as a water-resistive barrier, protecting your home’s structure from moisture damage. Start at the bottom of the wall and work your way up, overlapping each sheet by at least 6 inches. Use staples or nails to secure the material, ensuring a tight seal around windows, doors, and other penetrations. Pay close attention to corners and seams to prevent water intrusion. Properly installed housewrap is essential for preventing moisture from getting behind your siding. Remember to allow for proper ventilation to prevent moisture build-up.
Ventilation Behind James Hardie Siding
Adequate ventilation is vital to prevent moisture buildup behind the siding, which can lead to rot and mold. This is particularly important in climates with high humidity. Ensure proper ventilation by using vented flashing around windows and doors and by leaving a small gap between the sheathing and the siding. This gap allows for air circulation, drawing moisture away from the wall assembly. Consider using continuous ventilation systems for optimal air movement, especially in larger projects. Consult building codes in your area for specific ventilation requirements.
Flashing Installation Around Windows and Doors
Proper flashing is essential to prevent water from penetrating around windows and doors. Use flashing materials that are compatible with James Hardie siding and are designed for exterior applications. Install flashing around the perimeter of the window or door opening, extending it up and over the top, ensuring a watertight seal. Use caulk or sealant to further reinforce the seal and prevent leaks. Properly installed flashing prevents water from seeping behind the siding and causing damage to the wall assembly.
Underlayment Comparison
| Underlayment Type | Water Resistance | Durability | Cost |
|---|---|---|---|
| Felt Paper | Moderate | Low | Low |
| Housewrap (e.g., Tyvek) | High | Medium | Medium |
| Fluid-Applied Membranes | Very High | High | High |
| Synthetic Underlayments | High | High | Medium-High |
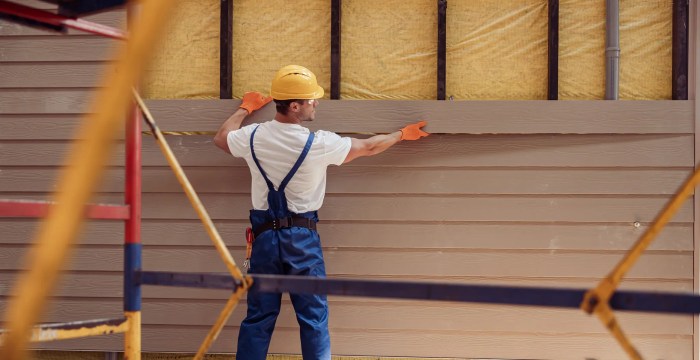
Siding Installation Techniques

Source: emasiding.com
Now that your sheathing and underlayment are in place, it’s time to get to the fun part: installing the James Hardie siding! This section will guide you through the process, from installing the foundational elements to finishing the job. Remember to always consult the manufacturer’s instructions for your specific siding product.
Starter Strips and J-Channels, How to install James Hardie siding
Starter strips and J-channels are crucial for creating a neat and professional-looking finish. Starter strips provide a straight, even base for the first row of siding, ensuring a consistent alignment across the entire wall. J-channels, on the other hand, are used to neatly finish the edges of the siding, particularly around windows and doors. They provide a clean, finished look and protect the edges of the siding from damage. Installation typically involves securing them to the sheathing with nails or screws, ensuring they are level and plumb. Proper spacing is key to prevent warping or buckling of the siding.
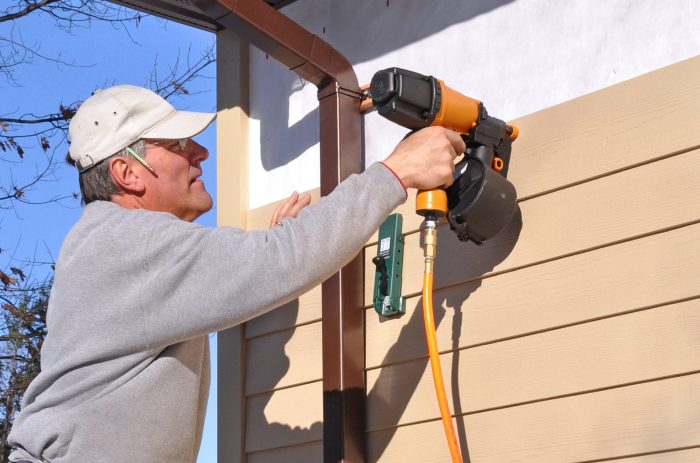
Installing Siding Panels
With the starter strips and J-channels in place, you can begin installing the siding panels. This involves carefully aligning each panel with the previous one, ensuring proper overlap and secure fastening. Overlapping is essential for weather protection; James Hardie recommends a specific overlap based on the siding type and its installation guidelines. Fastening should be done using appropriate nails or screws, driven in at the recommended spacing to avoid damaging the siding. Avoid overdriving fasteners, which can cause cracking or splitting. Always check the manufacturer’s instructions for recommended fastener type and spacing.
Cutting and Fitting Siding Around Openings
Installing siding around windows and doors requires careful measuring and cutting. Accurate measurements are crucial to ensure a precise fit and avoid gaps. Use a sharp utility knife or a circular saw with a fine-tooth blade to cut the siding to the required dimensions. For intricate cuts, a jigsaw might be more suitable. Remember to account for the overlap when measuring and cutting. Proper fitting ensures a weathertight seal and a professional appearance.
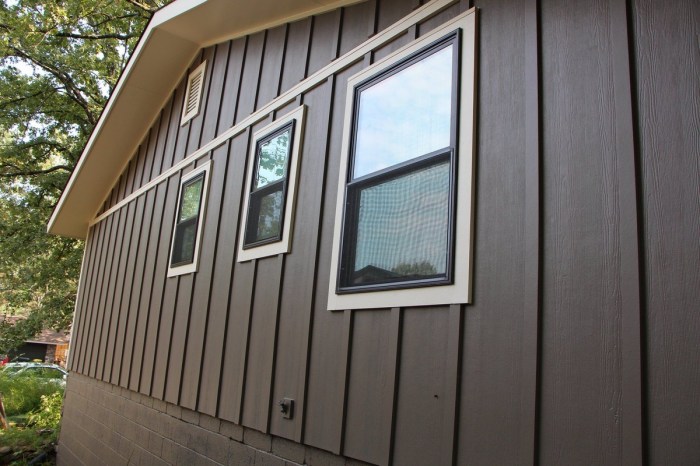
Horizontal vs. Vertical Siding Installation
While James Hardie siding can be installed both horizontally and vertically, the choice often depends on personal preference and the architectural style of the home. Horizontal installation is more common, creating a classic and clean look. Vertical installation, on the other hand, can add a modern and contemporary feel. The installation techniques are largely similar, but the orientation of the panels and the placement of fasteners will differ. Horizontal installation generally requires more attention to overlapping and ensuring water runoff.
Soffit and Fascia Installation
The soffit and fascia are the finishing touches that complete the exterior of your home. Soffit panels are installed horizontally under the eaves, while fascia boards are installed vertically along the edge of the roofline. These elements should be cut and installed to fit snugly, creating a clean and seamless transition from the siding to the roofline. Proper ventilation is important, so ensure adequate spacing between soffit panels to allow for airflow. Secure fastening is critical to withstand wind and weather.
Finishing Touches and Caulking
Source: porterfamilycontracting.com
Proper caulking is crucial for a long-lasting, weatherproof James Hardie siding installation. It seals gaps and prevents water intrusion, protecting your home from damage and ensuring the longevity of your siding. Neglecting this step can lead to costly repairs down the line, so taking the time to do it right is essential.
Caulk Selection for James Hardie Siding
Choosing the right caulk is paramount. For James Hardie siding, you’ll want a high-quality, paintable, exterior-grade caulk that’s flexible and durable enough to withstand temperature fluctuations and movement in the siding. Silicone-based caulks are generally a good choice due to their excellent water resistance and longevity. However, avoid using 100% silicone as it can be difficult to paint over. A paintable acrylic-latex caulk offers a good balance of flexibility, paintability, and water resistance. Always check the manufacturer’s recommendations for compatibility with James Hardie products.
Caulking Application Process
Applying caulk effectively requires attention to detail. Begin by cleaning the areas to be caulked thoroughly. Remove any loose debris, dust, or old caulk. Then, apply a bead of caulk smoothly and consistently using a caulking gun. For best results, use a backer rod to fill larger gaps before applying the caulk. This helps control the amount of caulk used and creates a neater, more durable seal. The caulk bead should be slightly larger than the gap, creating a slightly convex shape, allowing for expansion and contraction. Tool the caulk with a wet finger or a specialized caulking tool to create a smooth, professional finish, immediately after application.
Caulking Around Windows and Doors
Windows and doors are particularly vulnerable areas. Caulk thoroughly around the frames, paying close attention to the areas where the siding meets the window or door casing. Ensure complete sealing to prevent water penetration. Remember to remove any excess caulk immediately before it cures.
Achieving a Professional Finish
A professional-looking caulk job is achieved through attention to detail and careful application. Consistent bead size, smooth tooling, and color matching are key. Choose a caulk color that closely matches your siding to minimize its visual impact. If necessary, use a high-quality exterior paint to touch up any areas after the caulk has fully cured. Take your time, and don’t rush the process. A meticulously caulked installation will significantly enhance the overall appearance and longevity of your James Hardie siding.
Visual Guide to Caulking Techniques
Imagine a cross-section of a window frame meeting the James Hardie siding.
Step 1: Preparation: The area is clean and free of debris. A backer rod (a foam rod slightly smaller than the gap) is inserted into the gap.
Step 2: Caulk Application: A continuous bead of caulk is applied over the backer rod, slightly overflowing the gap.
Step 3: Tooling: A wet finger or caulking tool is used to smooth the caulk, creating a slightly convex shape and pressing it firmly against the siding and window frame. Excess caulk is removed.
Step 4: Finishing: The caulked area is smooth, neat, and consistent. The caulk is allowed to cure completely before painting, if necessary. The finished result should be a seamless transition between the siding and the window frame, with no gaps or imperfections visible.
Troubleshooting and Maintenance: How To Install James Hardie Siding
James Hardie siding, while durable, can encounter issues during installation or throughout its lifespan. Understanding common problems and implementing proper maintenance practices will ensure your siding looks great and lasts for years. This section covers troubleshooting common installation problems, long-term maintenance strategies, and answers frequently asked questions.
Common Installation Problems and Solutions
Several issues can arise during James Hardie siding installation. Improper nailing is a frequent culprit, leading to gaps, buckling, or even panel failure. Using the wrong nails, not spacing them correctly, or driving them too deeply or shallowly can all cause problems. Another common issue is improper flashing around windows and doors, leading to water penetration and potential damage. Finally, neglecting to properly seal seams and joints can result in leaks and aesthetic imperfections. Addressing these issues promptly is crucial to prevent larger, more costly repairs down the line. Solutions include using the correct nails and nailing pattern specified by James Hardie, ensuring proper flashing installation according to manufacturer guidelines, and meticulously sealing all seams and joints with high-quality caulk.
Long-Term Maintenance of James Hardie Siding
Regular cleaning and inspection are key to maintaining the beauty and longevity of your James Hardie siding. Dirt, mildew, and algae can accumulate over time, affecting the appearance and potentially the integrity of the siding. Annual cleaning with a pressure washer (using low pressure to avoid damage) and a mild detergent is recommended. Inspecting the siding regularly for any signs of damage, such as cracks, loose panels, or water damage, is also essential. Addressing minor issues promptly can prevent them from becoming major problems. For example, a small crack ignored could lead to water penetration and significant rot. Remember, prompt attention to even small issues is key to the siding’s long-term health.
Regular Cleaning and Inspection Procedures
A proactive maintenance approach significantly extends the lifespan of your James Hardie siding. Begin with a thorough visual inspection at least twice a year, looking for loose panels, damaged areas, or signs of water intrusion. Pay close attention to areas around windows, doors, and corners, as these are vulnerable points. A simple garden hose can often remove loose dirt and debris. For more stubborn stains or mildew, a pressure washer (low pressure!) with a mild detergent solution is effective. Always follow the manufacturer’s recommendations for cleaning products to avoid damaging the siding’s finish. After cleaning, allow the siding to dry completely before applying any sealant or paint if necessary. Regular cleaning prevents the buildup of dirt and grime that can accelerate deterioration.
Frequently Asked Questions
Understanding common questions about James Hardie siding installation and maintenance can help you avoid problems and ensure a long-lasting, attractive exterior.
- Q: How often should I clean my James Hardie siding? A: At least twice a year, more often in areas with heavy pollen or mildew.
- Q: What type of cleaner should I use? A: A mild detergent and water solution is generally sufficient. Avoid harsh chemicals.
- Q: Can I use a pressure washer on my James Hardie siding? A: Yes, but use low pressure to avoid damage. Always test a small, inconspicuous area first.
- Q: What should I do if I find a damaged panel? A: Contact a qualified contractor for repair or replacement. Do not attempt extensive repairs yourself.
- Q: How long does James Hardie siding typically last? A: With proper installation and maintenance, James Hardie siding can last 30-50 years or more.
Closing Notes

Source: mhxdesigns.com
Installing James Hardie siding is a significant undertaking, but by following the steps outlined in this guide, you can transform your home’s exterior with a beautiful and long-lasting finish. Remember, proper planning and attention to detail are key to a successful installation. From preparing the surface and selecting the right materials to mastering the installation techniques and finishing with precise caulking, each step contributes to the overall outcome. Take your time, follow the instructions carefully, and you’ll be proud of your handiwork for years to come. Don’t hesitate to consult additional resources and seek professional help if needed, especially for complex aspects of the installation.
User Queries
Can I install James Hardie siding myself?
While possible for DIYers with some construction experience, it’s a labor-intensive project. Consider your skill level and the size of your house before attempting it alone. Professional help may be beneficial for large or complex projects.
How long does James Hardie siding last?
With proper installation and maintenance, James Hardie siding can last 30-50 years or even longer.
What’s the best time of year to install James Hardie siding?
Spring or fall are generally ideal, avoiding extreme heat or cold that can affect the materials and installation process.
How much does James Hardie siding cost?
Costs vary greatly depending on the type of siding, house size, and labor costs. Get multiple quotes from contractors for accurate pricing.
What kind of warranty does James Hardie siding have?
James Hardie offers warranties that vary by product; check their website for specific details on coverage and terms.